Game development with FXGL
GITHUB PROJECT: https://github.com/Pi4J/pi4j-example-fxgl
As described on the previous page you can use JavaFX to build user interfaces which behave exactly the same on your PC and Raspberry Pi. Let’s go a step further and make a game with an “Arcade” controller.
For this project, we will be using FXGL, an opensource library on top of JavaFX to build games.
The image of the crowpi project has every prerequisite installed to work with javaFX/FXGL
The controller
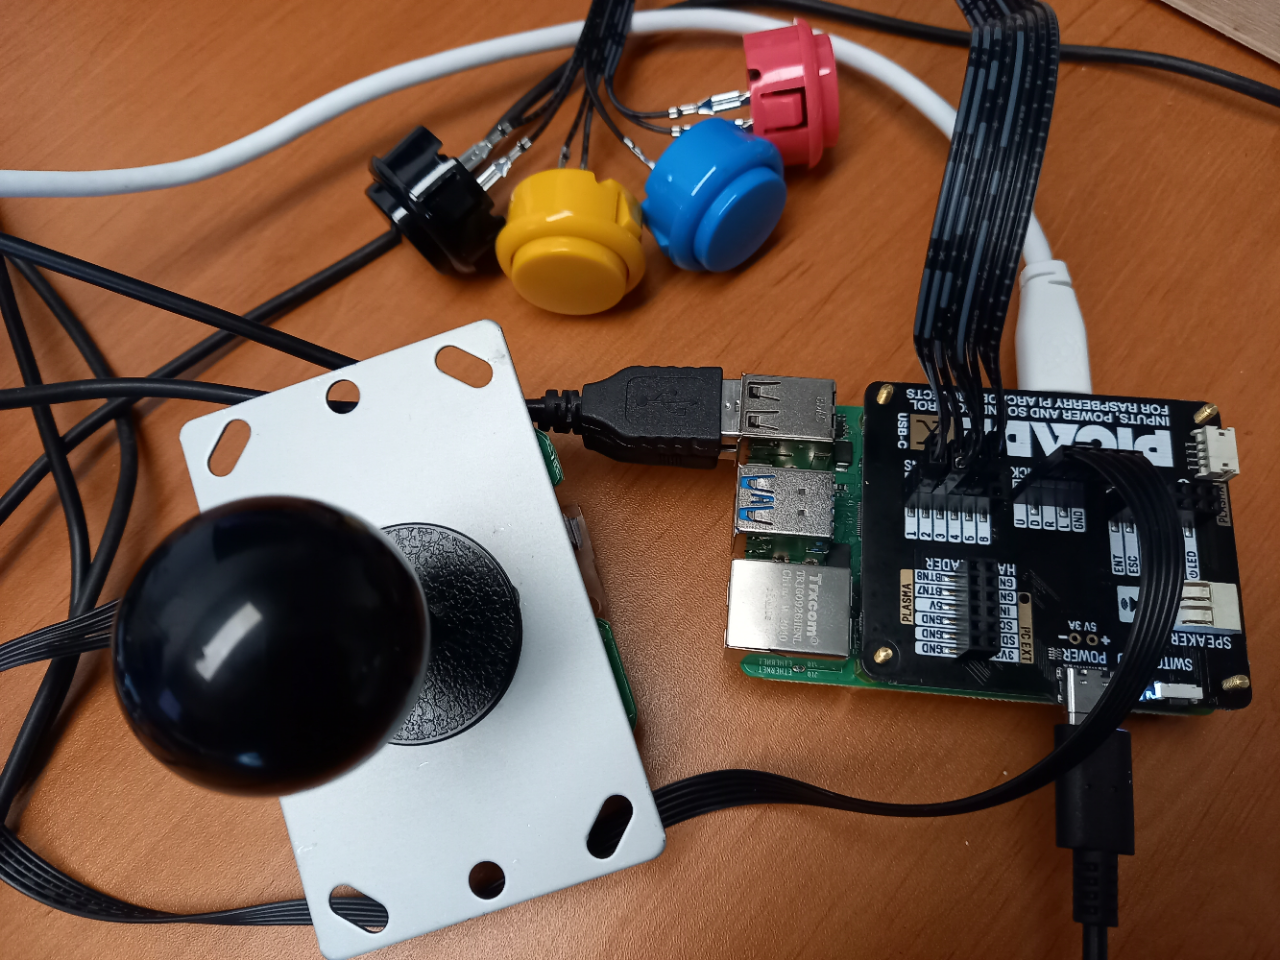
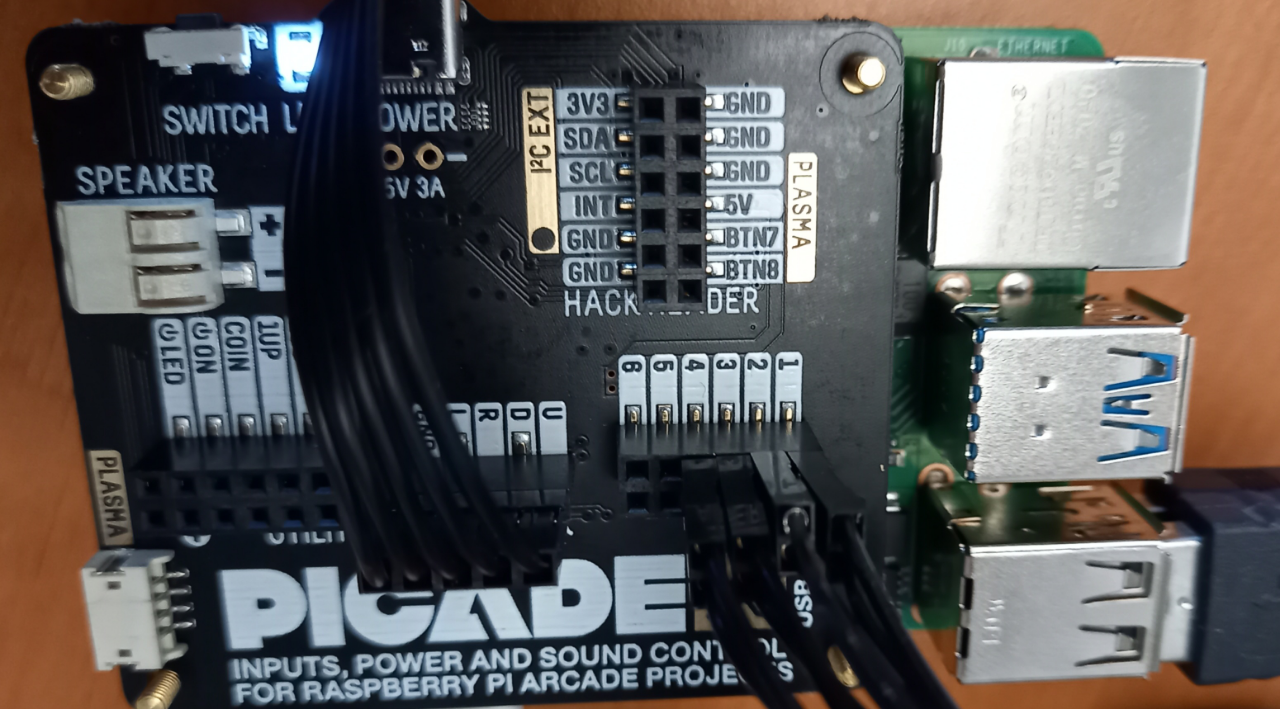
This project uses an Arcade kit in combination with a Picade X HAT USB-C to easily connect the wires of the buttons and joystick.
Connect the USB power to the hat instead of your Raspberry Pi, and use the power button on the hat to start your Raspberry Pi.

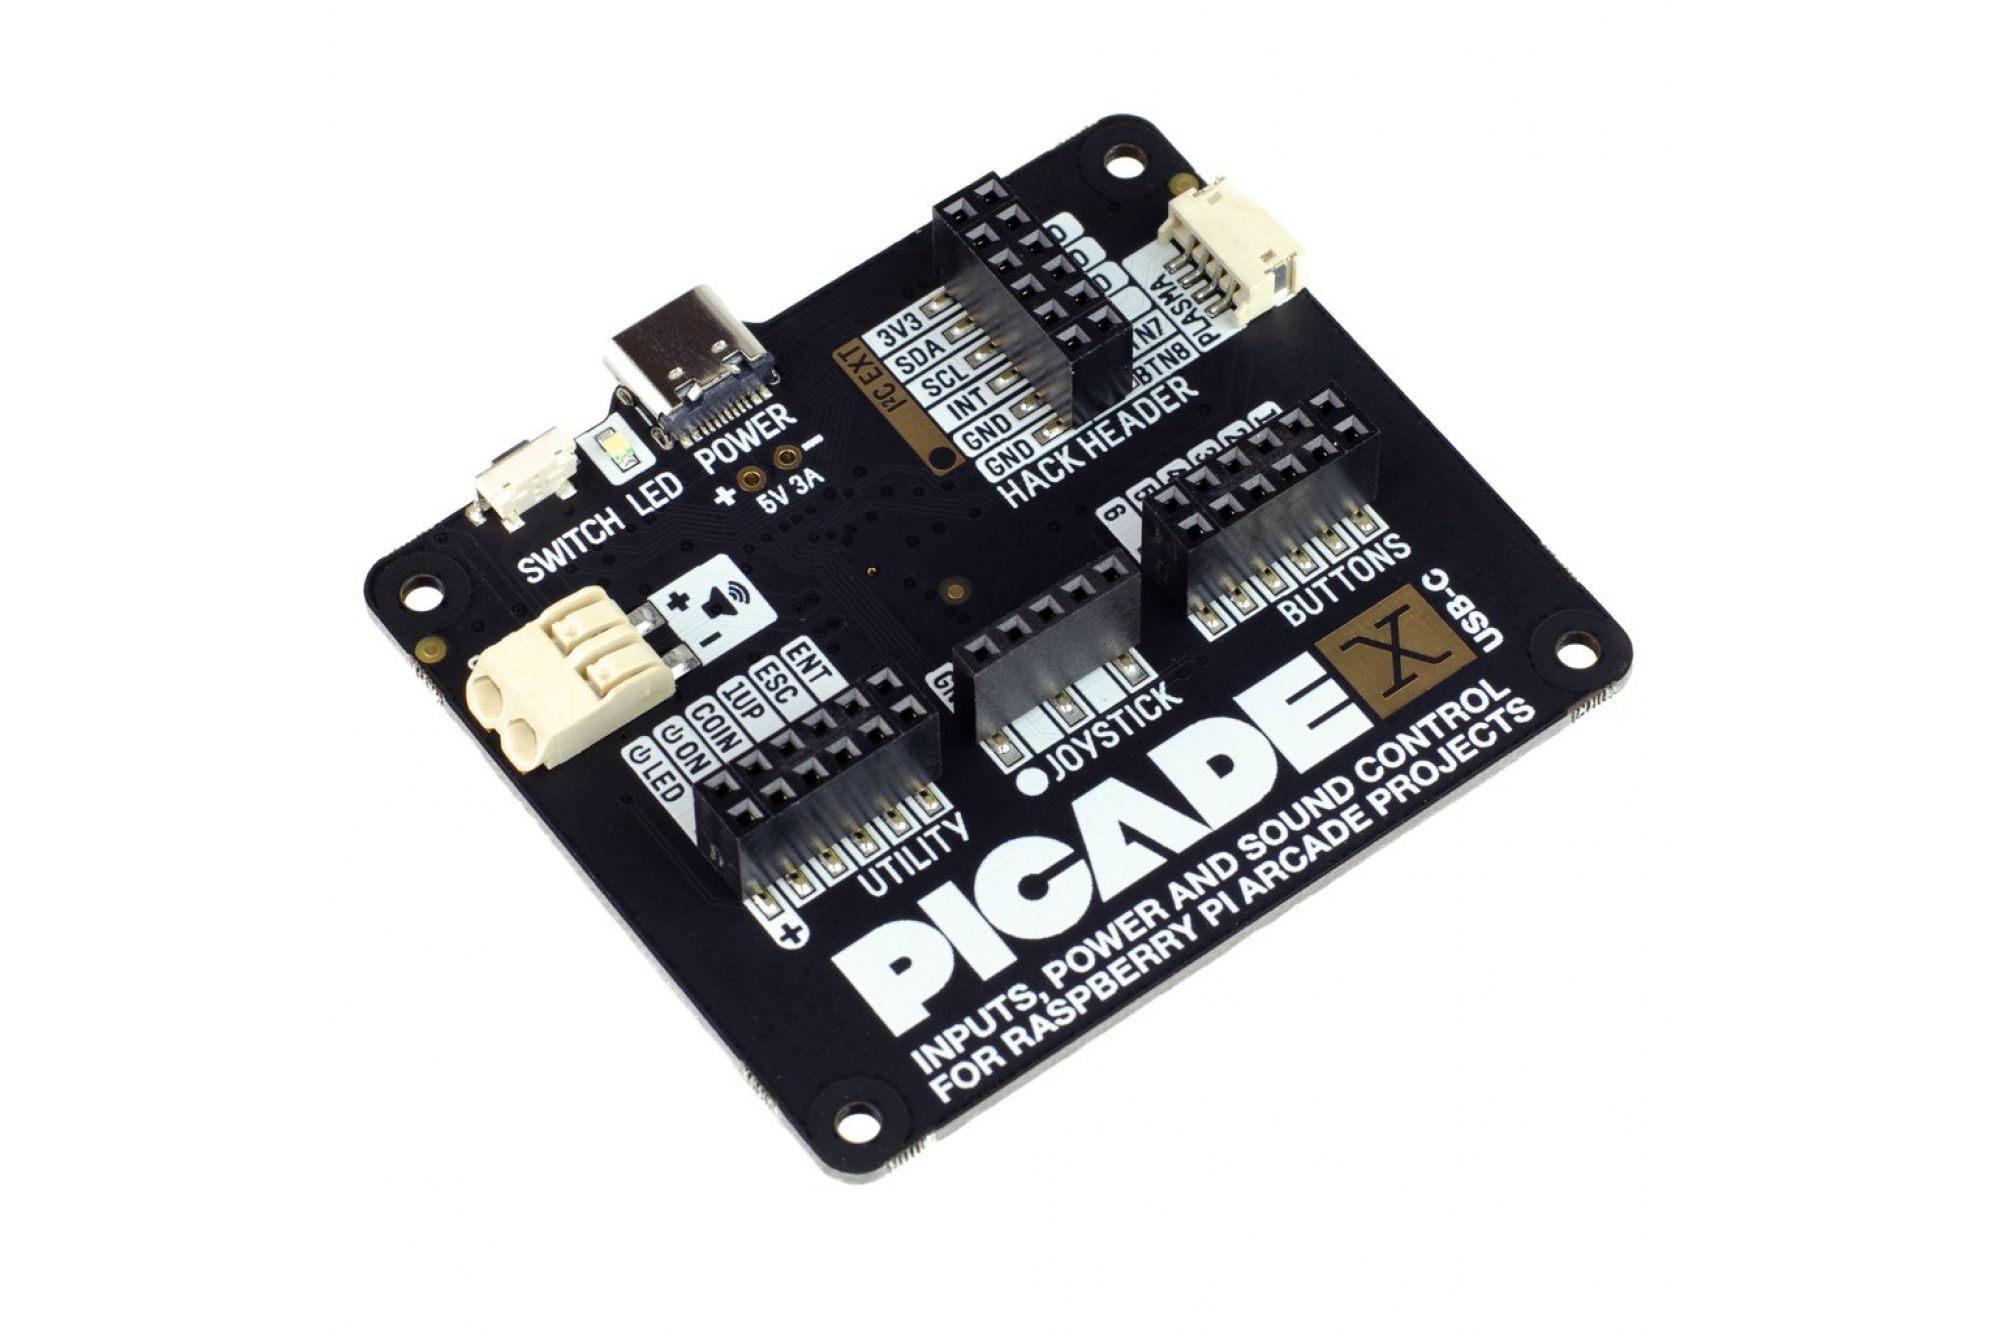
Pimoroni provides a GitHub project with software to use this hat with RetroPie, but this project aims to take full control of the hardware with Java.
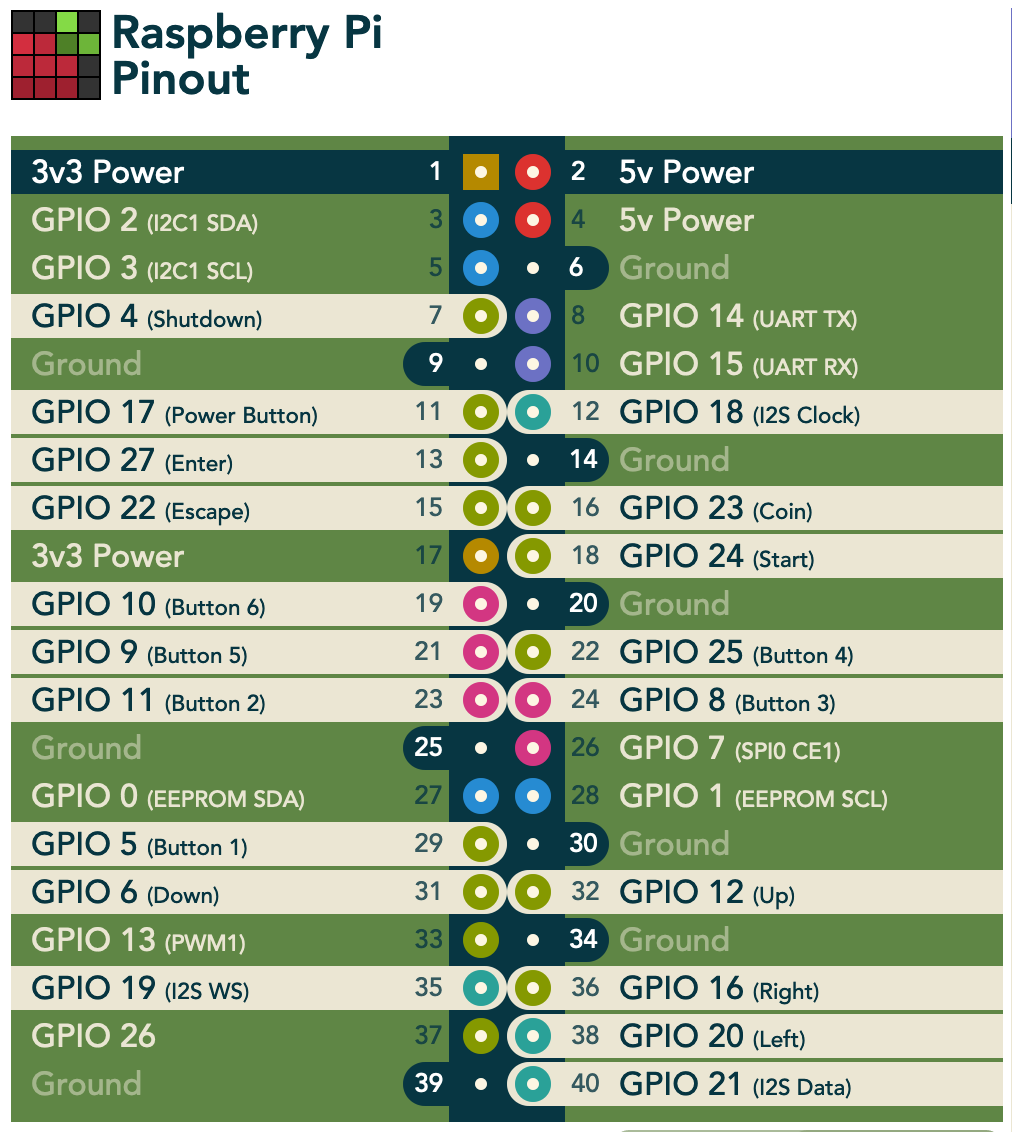
The GPIO numbers are defined by the hat and can be found on pinout.xyz
Steps to run snake on your Raspberry Pi
- Download the project from GitHub and build it:
$ git clone https://github.com/Pi4J/pi4j-example-fxgl.git
$ cd pi4j-example-fxgl/
$ mvn clean package
- Change to the distribution directory where you can find the generated package and required Java-modules. Start it with the provided run.sh script:
$ cd target/distribution
$ ls -l
total 644
-rw-r--r-- 1 pi pi 364456 Jun 19 10:04 pi4j-core-2.0-SNAPSHOT.jar
-rw-r--r-- 1 pi pi   7243 Jun 19 10:04 pi4j-example-minimal-0.0.1.jar
-rw-r--r-- 1 pi pi 142461 Jun 19 10:04 pi4j-library-pigpio-2.0-SNAPSHOT.jar
-rw-r--r-- 1 pi pi  37302 Jun 19 10:04 pi4j-plugin-pigpio-2.0-SNAPSHOT.jar
-rw-r--r-- 1 pi pi  26917 Jun 19 10:04 pi4j-plugin-raspberrypi-2.0-SNAPSHOT.jar
-rwxr-xr-x 1 pi pi    101 Jun 19 10:04 run.sh
-rwxr-xr-x 1 pi pi    101 Jun 19 10:04 run-kiosk.sh
-rw-r--r-- 1 pi pi  52173 Jun 19 10:04 slf4j-api-2.0.0-alpha0.jar
-rw-r--r-- 1 pi pi  15372 Jun 19 10:04 slf4j-simple-2.0.0-alpha0.jar
$ sudo ./run.sh
There are two run scripts:run.sh: runs the application in standard windowed moderun-kiosk.sh: runs the application in DRM mode, see kiosk mode
Picade
To control our game we use the hardware mentioned above. Tho following mapper uses a similar binding method as in the minimal example
Pimapper
To make use of the picade controls for existing FXGL project we provide an interface to simply extend your application.
Integrate piMapping
The code for the piMapper is found in the example snake game.
Update Game
Change your Game from “extend GameApplication” to “extend PicadeGameApplication” PicadeGameApplication overrides the GameApplication class of FXGL and provides additional functions to map the picade controllers
public class FxglExample extends PicadeGameApplication
Update Key Inputs
Now we can use the new piMapper to address keys as well as picade controls. To do this, we need to tell the onKeyDown function, what control we want. Inputs are defined as in previous tutorials in the picadeControl enum
onKeyDown(PicadeControl.PIN_BUTTON_1, KeyCode.F, () -> player.getComponent(SnakeHeadComponent.class).grow());
onKeyDown(KeyCode.G, () -> player.getComponent(SnakeHeadComponent.class).log());
GPIO
- The Enum PicadeControl handles the the gpio numbers for the connected controls. pinout.xyz
PIN_JOYSTICK_UP(12),
PIN_JOYSTICK_DOWN(6),
PIN_JOYSTICK_LEFT(20),
PIN_JOYSTICK_RIGHT(16),
PIN_BUTTON_1(5);
Run Scripts
run.shRuns the application in windowed mode
#!/usr/bin/env bash
java \
  -Dglass.platform=gtk \
  -Djava.library.path=/opt/javafx-sdk-17/lib \
  -Dmonocle.platform.traceConfig=false \
  -Dprism.verbose=false \
  -Djavafx.verbose=false \
  --module-path .:/opt/javafx-sdk-17/lib \
  --add-modules javafx.controls \
  --module com.pi4j.example/com.pi4j.example.FxglExample $@
run-kiosk.shRuns the application with monocle in DRM (Direct rendering mode). More to kiosk mode here