8x8 LED Matrix
Controlling a 8x8 LED Matrix with MAX7219 via SPI
GITHUB PROJECT: github.com/Pi4J/pi4j-jbang > Pi4JLedMatrixSpi.java
This example is explained in the following video:
Intro
Before proceeding with this example, make sure that you have a Raspberry Pi prepared to execute Java code with JBang as explained here.
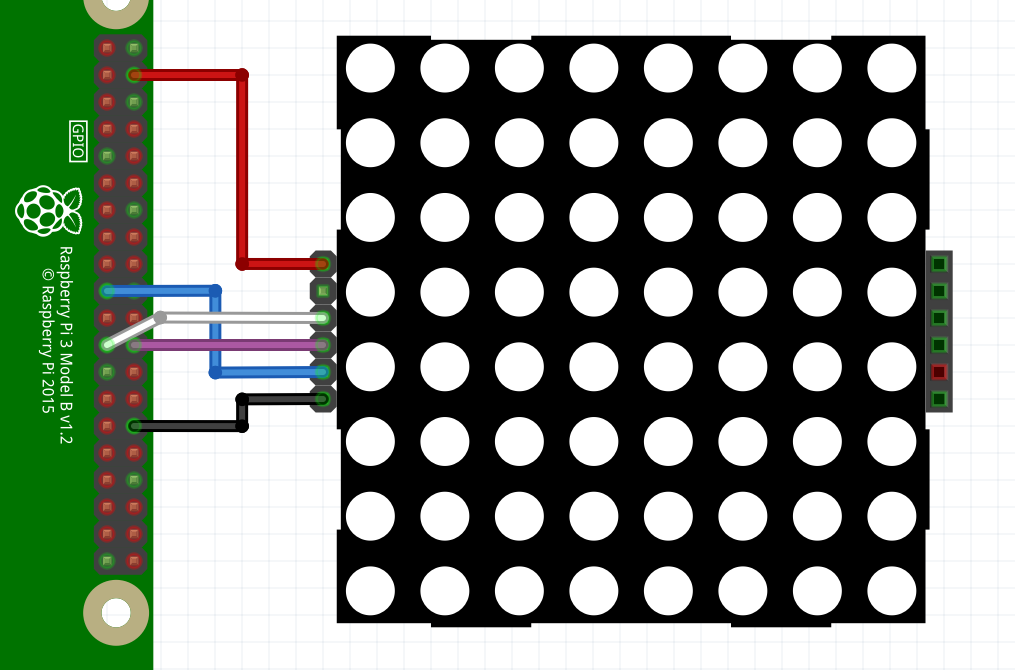
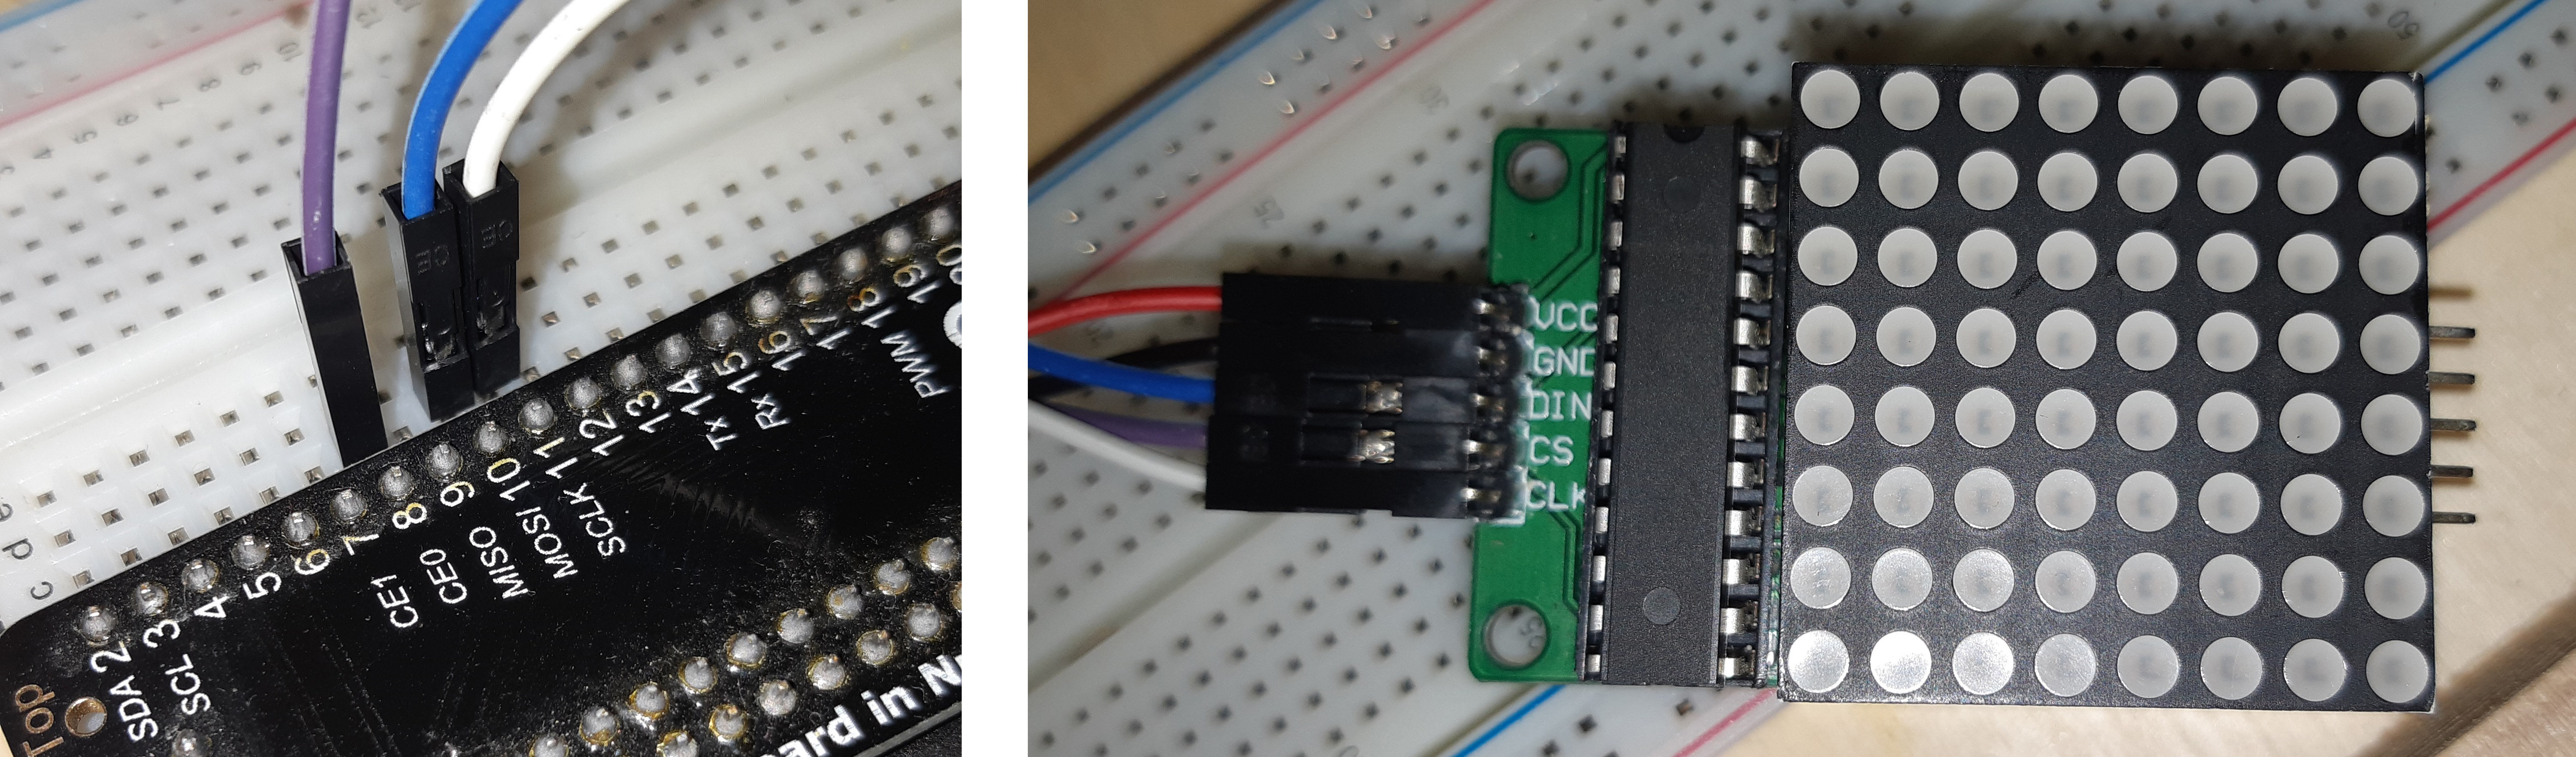
Wiring
SPI requires four connections, but as we don’t read data back, we only connect three of them plus power and ground.
- BCM 10 (MOSI) to DIN
- BCM 11 (SCLK) to CLK
- BCM 8 (CE0) to CS
- 5V to VCC
- Ground to ground
Application
Please check the full code which is available in the GitHub repository. This is just the main method, which initializes Pi4J and the SPI-object, which is then used to configure the device and send several demo content. We invite you to take a look at the various methods to understand how content is sent to the display. This is a nice use-case to understand how bits and bytes are used to generate images and characters.

public static void main(String[] args) throws Exception {
    var pi4j = Pi4J.newAutoContext();

    // Initialize SPI
    console.println("Initializing the matrix via SPI");

    var spiConfig = Spi.newConfigBuilder(pi4j)
        .id("Matrix SPI Provider")
        .name("matrix-spi")
        .bus(SpiBus.BUS_0)
        .chipSelect(SpiChipSelect.CS_0)
        .baud(Spi.DEFAULT_BAUD)
        .mode(SpiMode.MODE_0)
        .provider("pigpio-spi")
        .build();
    spi = pi4j.create(spiConfig);

    spi.write(SpiCommand.TEST.getValue(), (byte) 0x01);
    System.out.println("Test mode all on");
    Thread.sleep(1000);

    spi.write(SpiCommand.TEST.getValue(), (byte) 0x00);
    System.out.println("Test mode all off");
    Thread.sleep(1000);

    spi.write(SpiCommand.DECODE_MODE.getValue(), (byte) 0x00);
    System.out.println("Use all bits");

    spi.write(SpiCommand.BRIGHTNESS.getValue(), (byte) 0x08);
    System.out.println("Changed brightness to medium level"
    + " (0x00 lowest, 0x0F highest)");

    spi.write(SpiCommand.SCAN_LIMIT.getValue(), (byte) 0x0f);
    System.out.println("Configured to scan all digits");

    spi.write(SpiCommand.SHUTDOWN_MODE.getValue(), (byte) 0x01);
    System.out.println("Woke up the MAX7219, is off on startup");

    allOff();

    showOneByOne(100);

    showRows( 250);
    showCols( 250);

    showRandomOutput( 5, 500);

    showAllImages( 2000);
    showAllAsciiCharacters( 750);
    scrollAllAsciiCharacters( 50);

    allOff();

    pi4j.shutdown();

    console.println("Finished");
}
Running the Application
Because this example uses the PiGpio plugin, we need to execute it with sudo. Without the need of any further configuration, installation, dependency download, or compiling, we can now run this code with:
$ sudo `which jbang` Pi4JLedMatrixSpi.java
[jbang] Resolving dependencies...
[jbang] org.slf4j:slf4j-api:1.7.35
[jbang] org.slf4j:slf4j-simple:1.7.35
[jbang] com.pi4j:pi4j-core:2.3.0
[jbang] com.pi4j:pi4j-plugin-raspberrypi:2.3.0
[jbang] com.pi4j:pi4j-plugin-linuxfs:2.3.0
[jbang] com.pi4j:pi4j-plugin-pigpio:2.3.0
[jbang] Dependencies resolved
[jbang] Building jar for Pi4JLedMatrixSpi.java...
[main] INFO com.pi4j.Pi4J - New auto context
[main] INFO com.pi4j.Pi4J - New context builder
[main] INFO com.pi4j.platform.impl.DefaultRuntimePlatforms - adding platform to managed platform map [id=raspberrypi; name=RaspberryPi Platform; priority=5; class=com.pi4j.plugin.raspberrypi.platform.RaspberryPiPlatform]
[main] INFO com.pi4j.util.Console - Initializing the matrix via SPI
Test mode all on
Test mode all off
Use all bits
Changed brightness to medium level (0x00 lowest, 0x0F highest)
Configured to scan all digits
Woke up the MAX7219, is off on startup
One by one on row 1
One by one on row 2
One by one on row 3
One by one on row 4
One by one on row 5
One by one on row 6
One by one on row 7
One by one on row 8
Row 1 is on
Row 2 is on
Row 3 is on
Row 4 is on
Row 5 is on
Row 6 is on
Row 7 is on
Row 8 is on
Col 0 is on
Col 1 is on
Col 2 is on
Col 3 is on
Col 4 is on
Col 5 is on
Col 6 is on
Col 7 is on
Random effect 1
Random effect 2
Random effect 3
Random effect 4
Random effect 5
Showing image HEART
Showing image PI_LOGO
Showing image SMILEY
Showing image ARROW_LEFT
Showing image CROSS
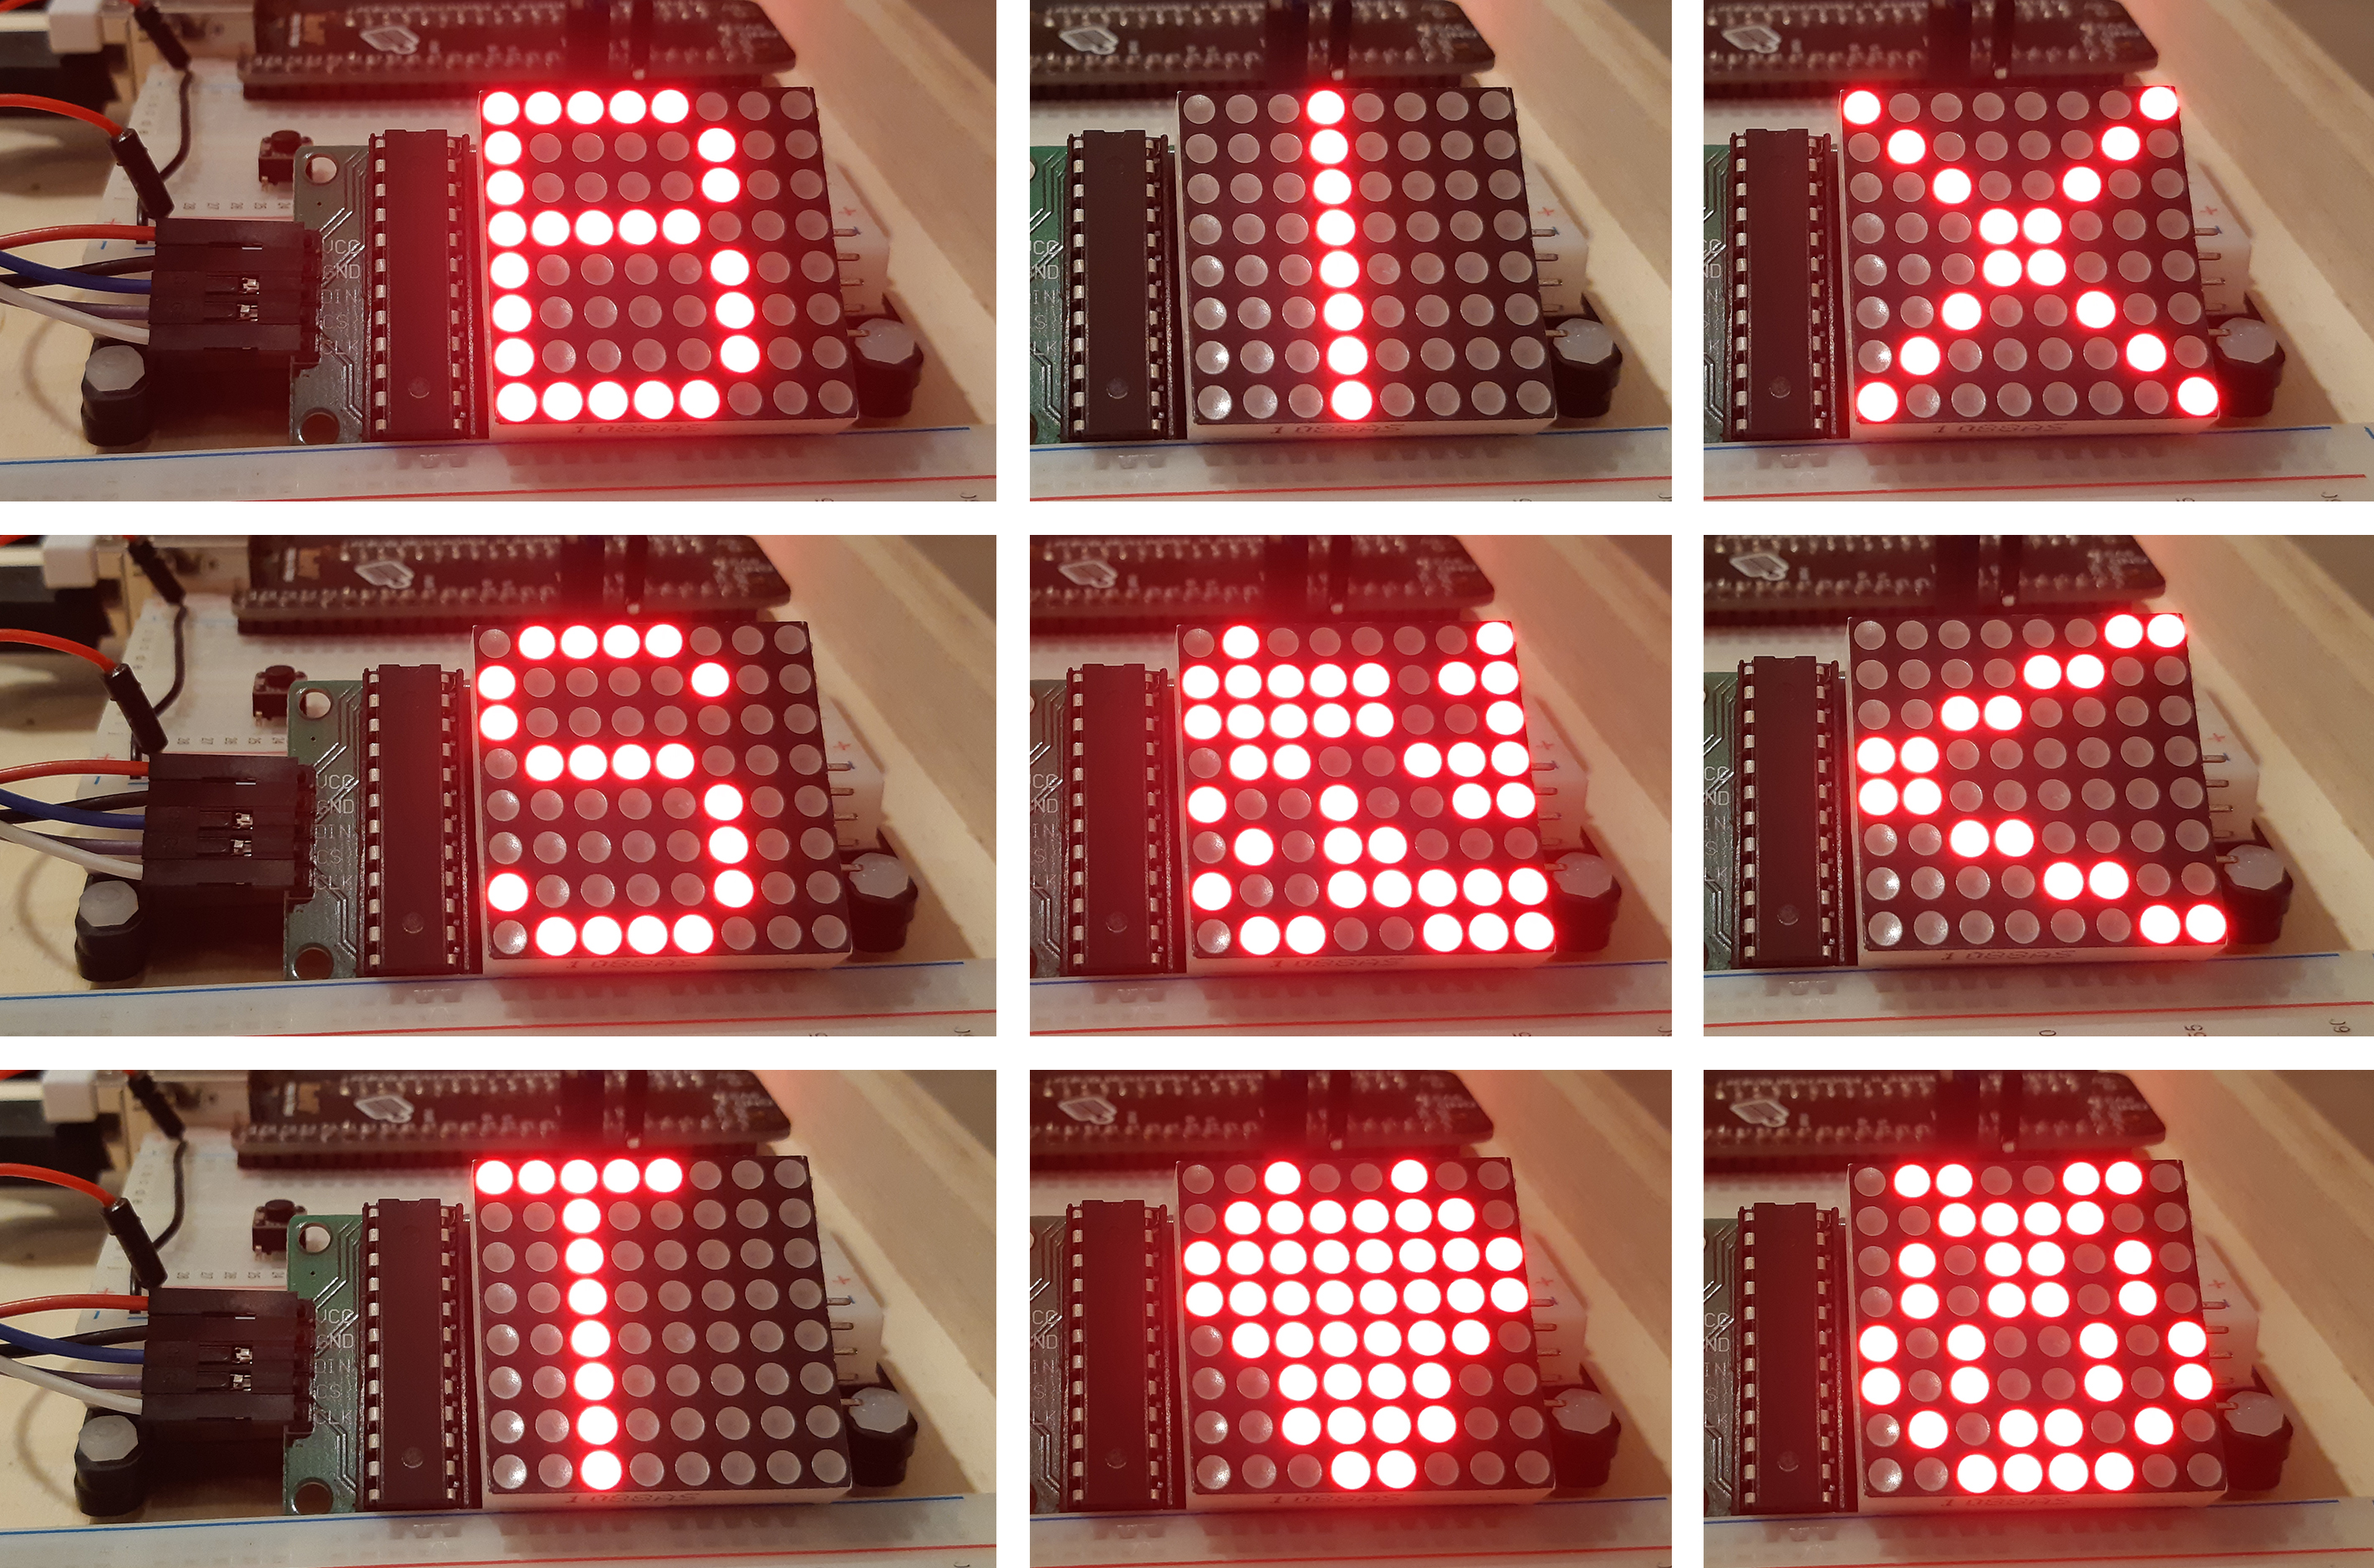
Written to SPI : SPACE
Written to SPI : A
Written to SPI : B
Written to SPI : E
Written to SPI : I
Written to SPI : S
Written to SPI : T
Scrolled : SPACE
Scrolled : A
Scrolled : B
Scrolled : E
Scrolled : I
Scrolled : S
Scrolled : T
[main] INFO com.pi4j.util.Console - Finished
Conclusion
The given example code is pretty long as it contains many helper methods and some enums. Normally in a “full Java application”, you would create separate files for these enums to keep the code easier to organize.
But for an example as this one, it’s nice that we can combine everything in one file and execute it with JBang.