Develop with Intellij IDEA
The CrowPi example project contains settings to make it easy to develop on a PC with IntelliJ IDEA and execute the application on the CrowPi. The articles, instructions and pictures are created accordingly. IntelliJ IDEA is from available Jetbrains in different versions. The community version has enough functionality for development with the CrowPi and is available for Windows, MacOS and Linux, but NOT for Raspberry Pi. The download can be found here.
The subsequent setup of IntelliJ IDEA is identical on all platforms.
Clone the repository
As soon as we have installed the development environment, it is time to clone the entry-level project for the CrowPi. The source code can be found on GitHub. In order to clone the repository, the corresponding link must be copied on GitHub and then imported into IntelliJ IDEA. Now step-by-step in pictures a more detailed instruction.
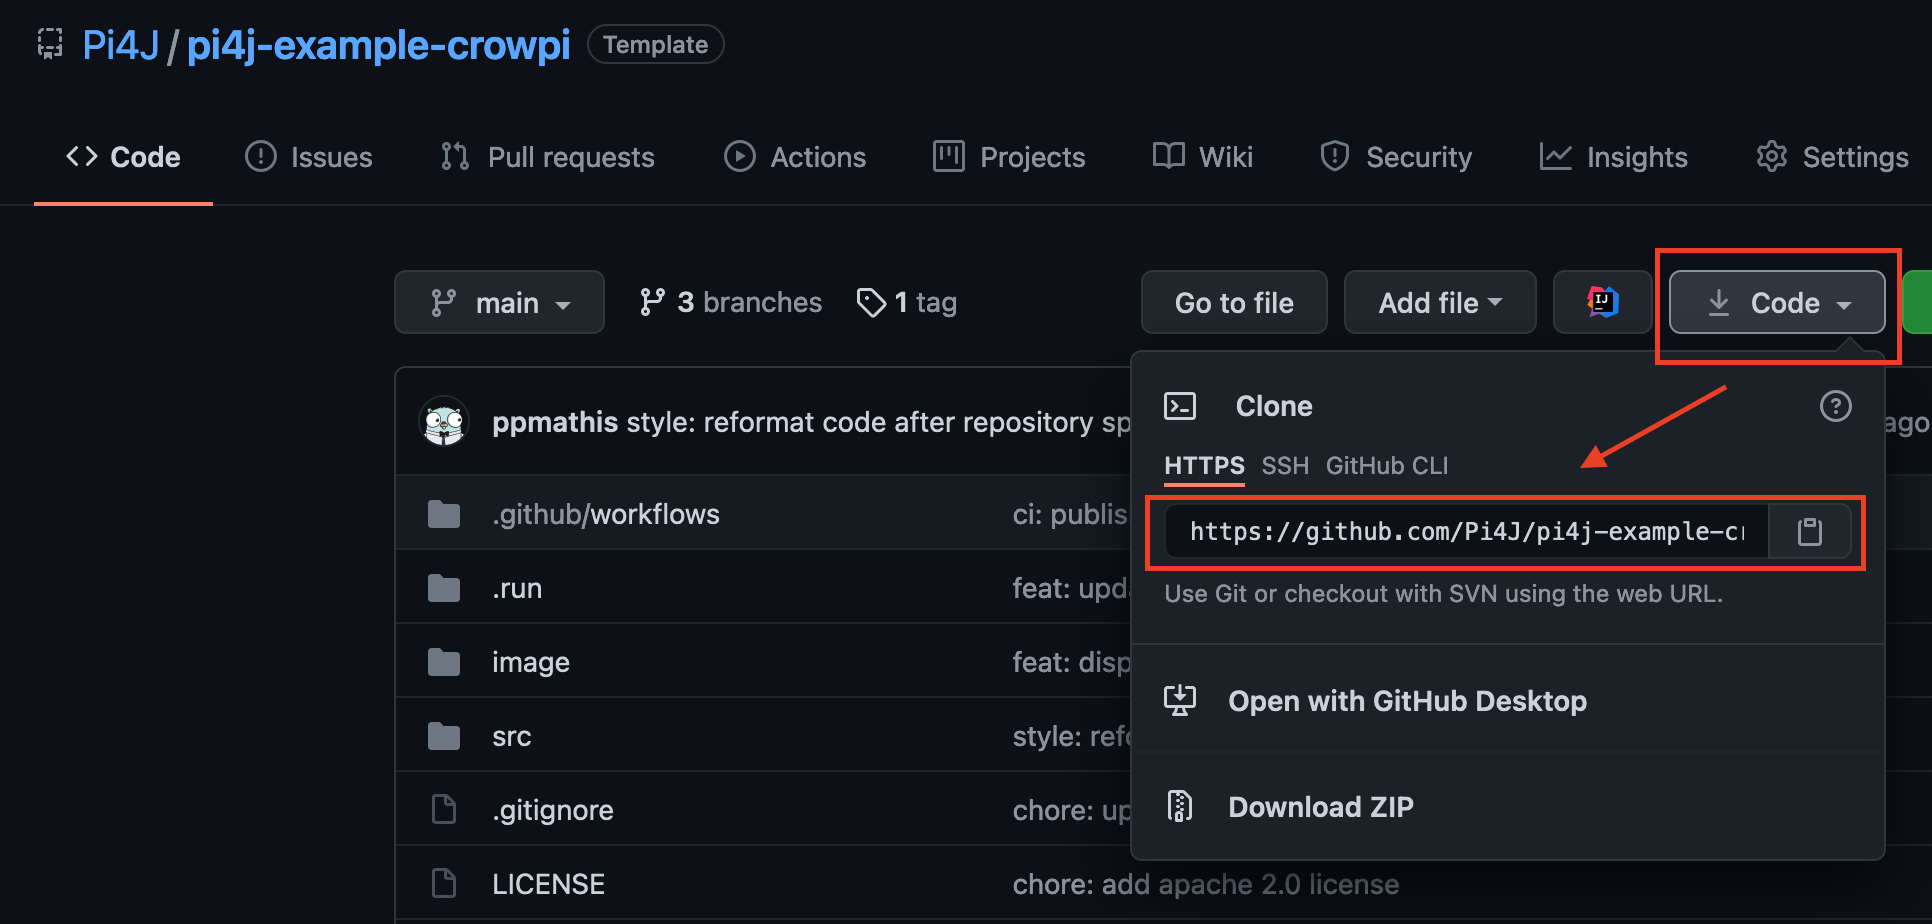
Visit CrowPi on GitHub and copy the link to clone as described in the picture.
Import the project
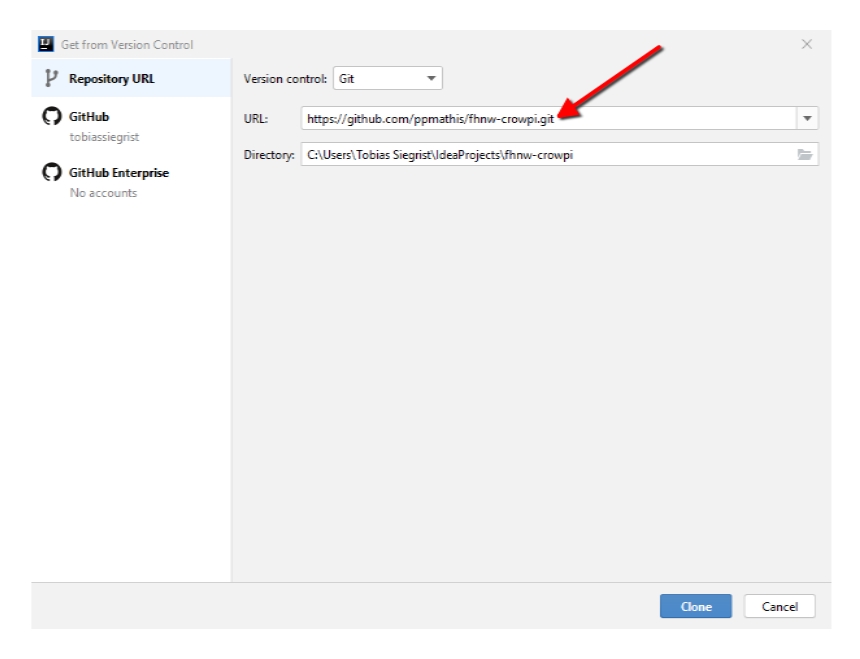
In the start window of IntelliJ is the option Get from VCS available. This must be selected so that the code can be cloned directly from GitHub. Then you can simply paste the link that was previously copied from GitHub. By confirming with Clone the process is started and any necessary authentication of the user is carried out. Simply follow the instructions of the tool.

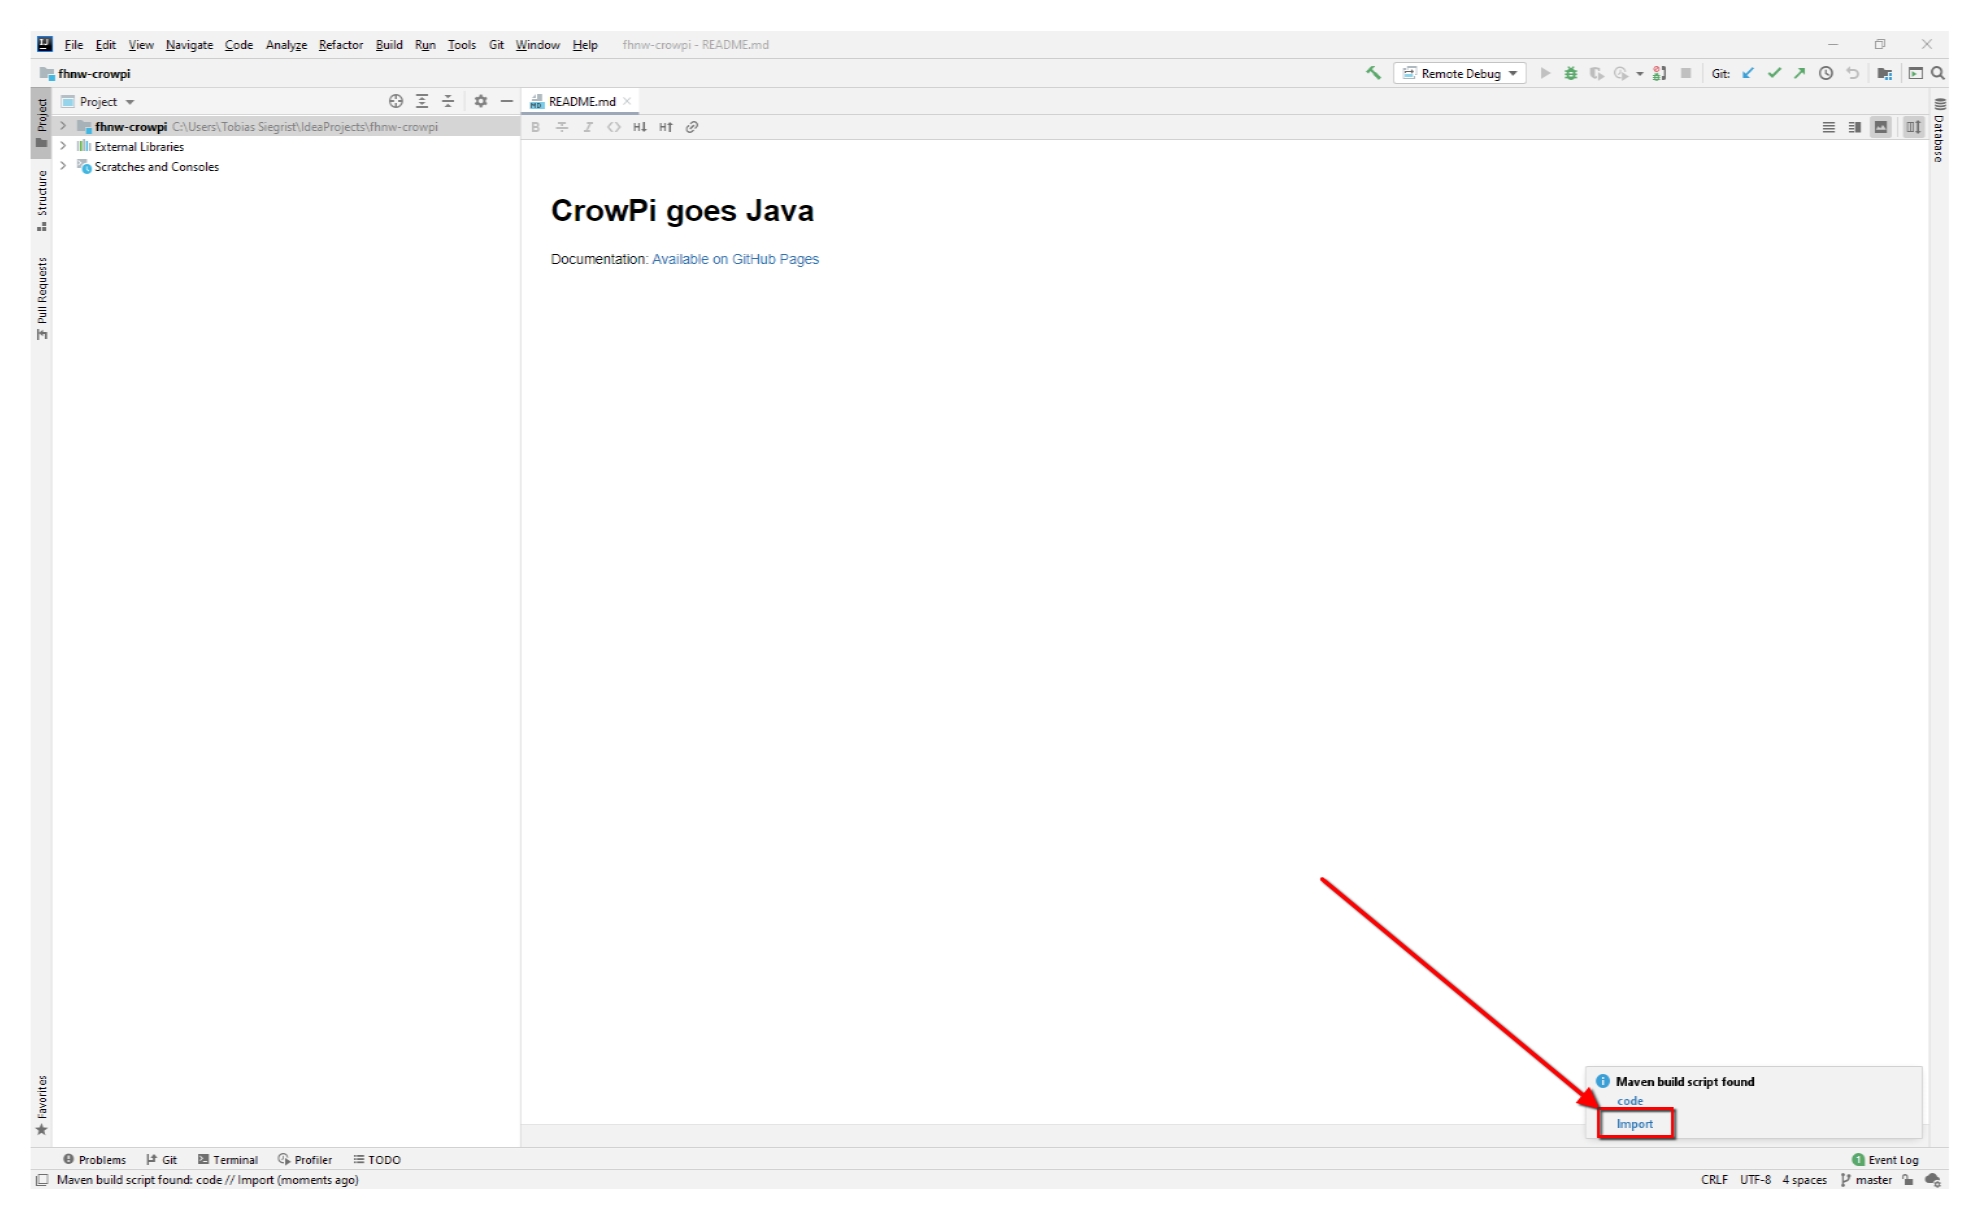
As soon as the project has been completely cloned on the local computer, the project opens automatically in the development environment. A small dialog pops up at the bottom right. This must be confirmed so that the repository can be properly initialized. Maven is a software project management tool, more information can be found in the Apache Maven Project. Basically, however, nothing needs to be changed. The CrowPi project already offers a complete setup and is easy to use.
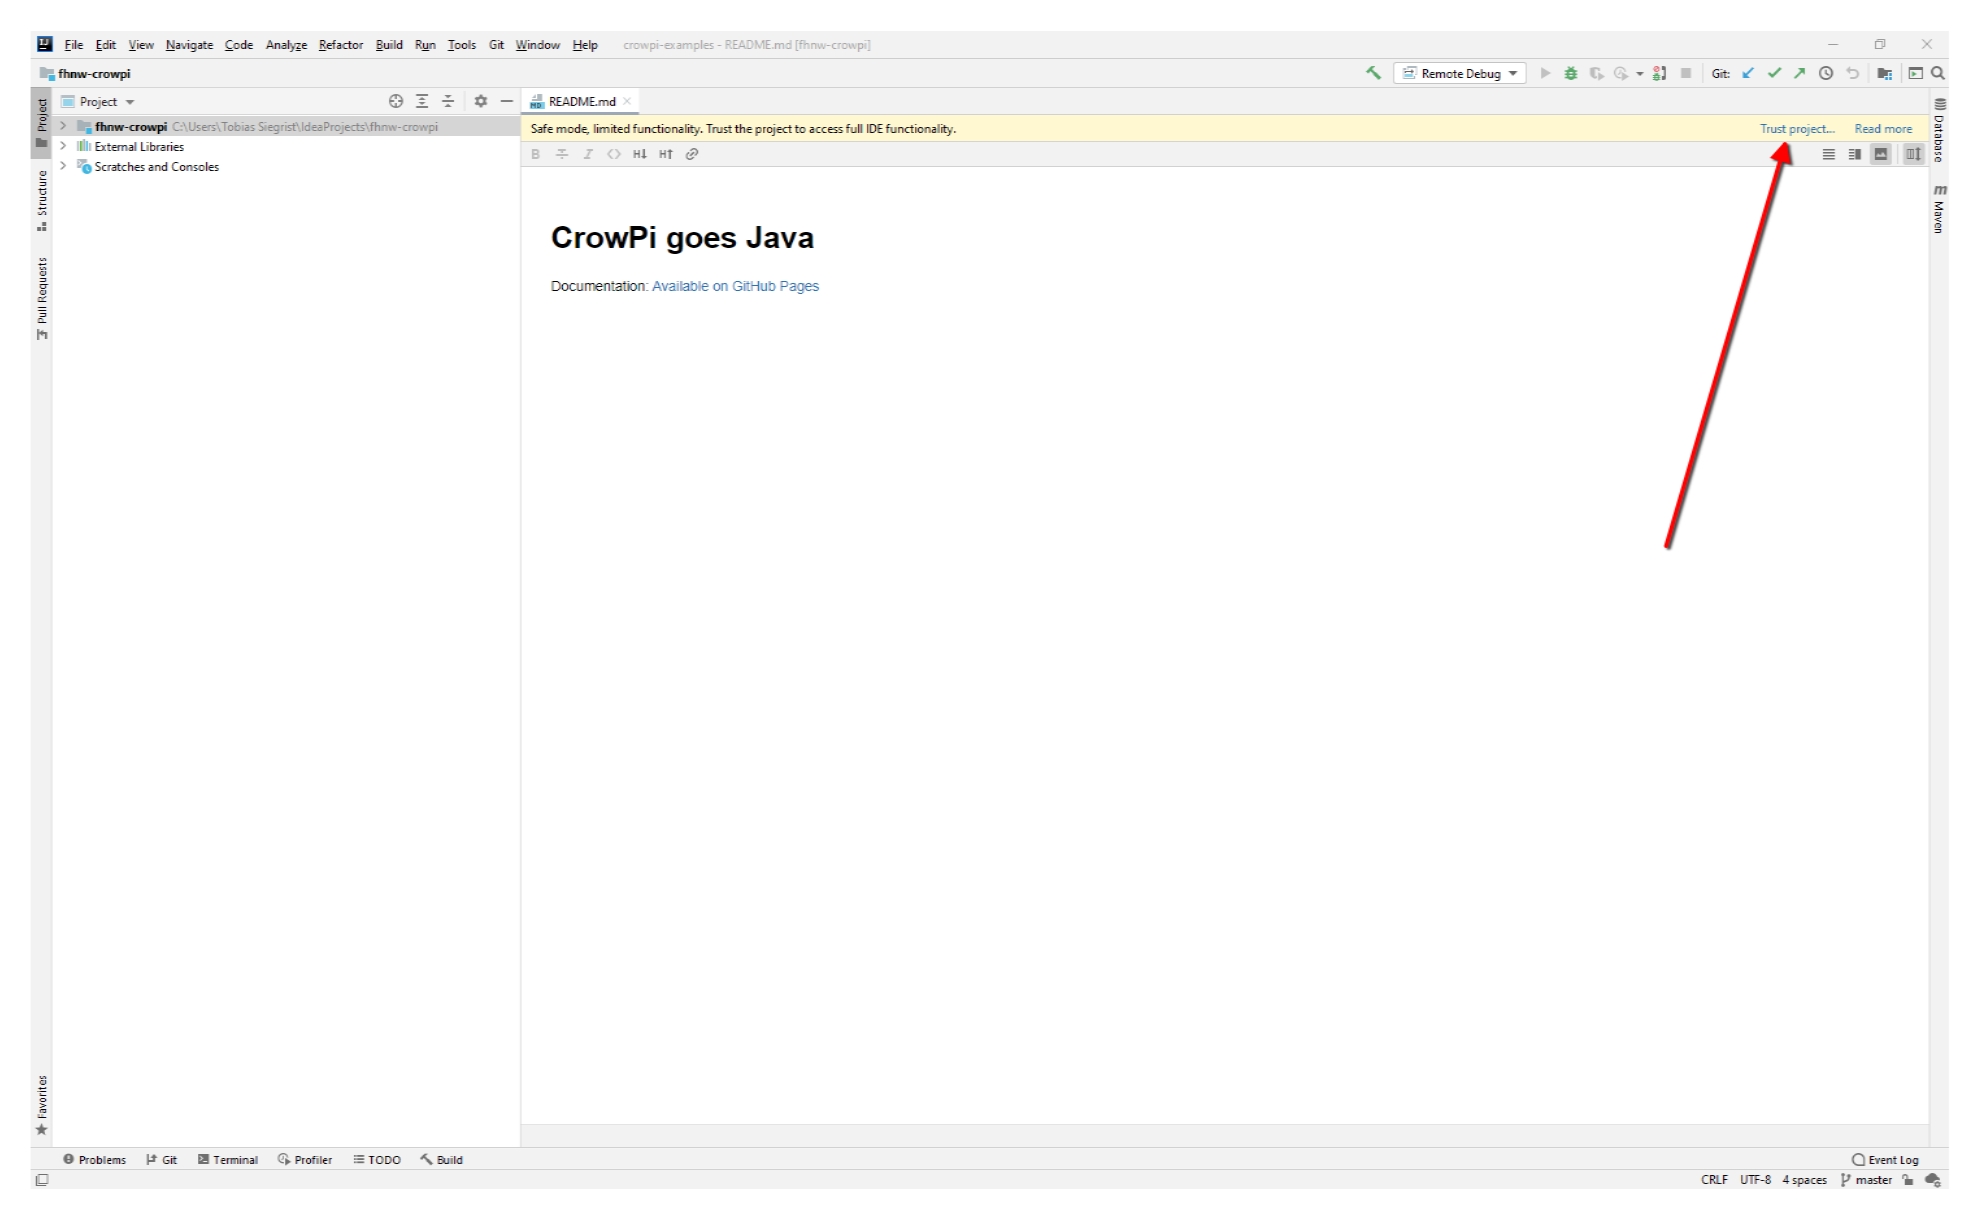
Importing the Maven project triggers a security warning at IntelliJ. Click on “Trust project” to confirmed when you downloaded the soruces from the official Pi4J CrowPi repository.
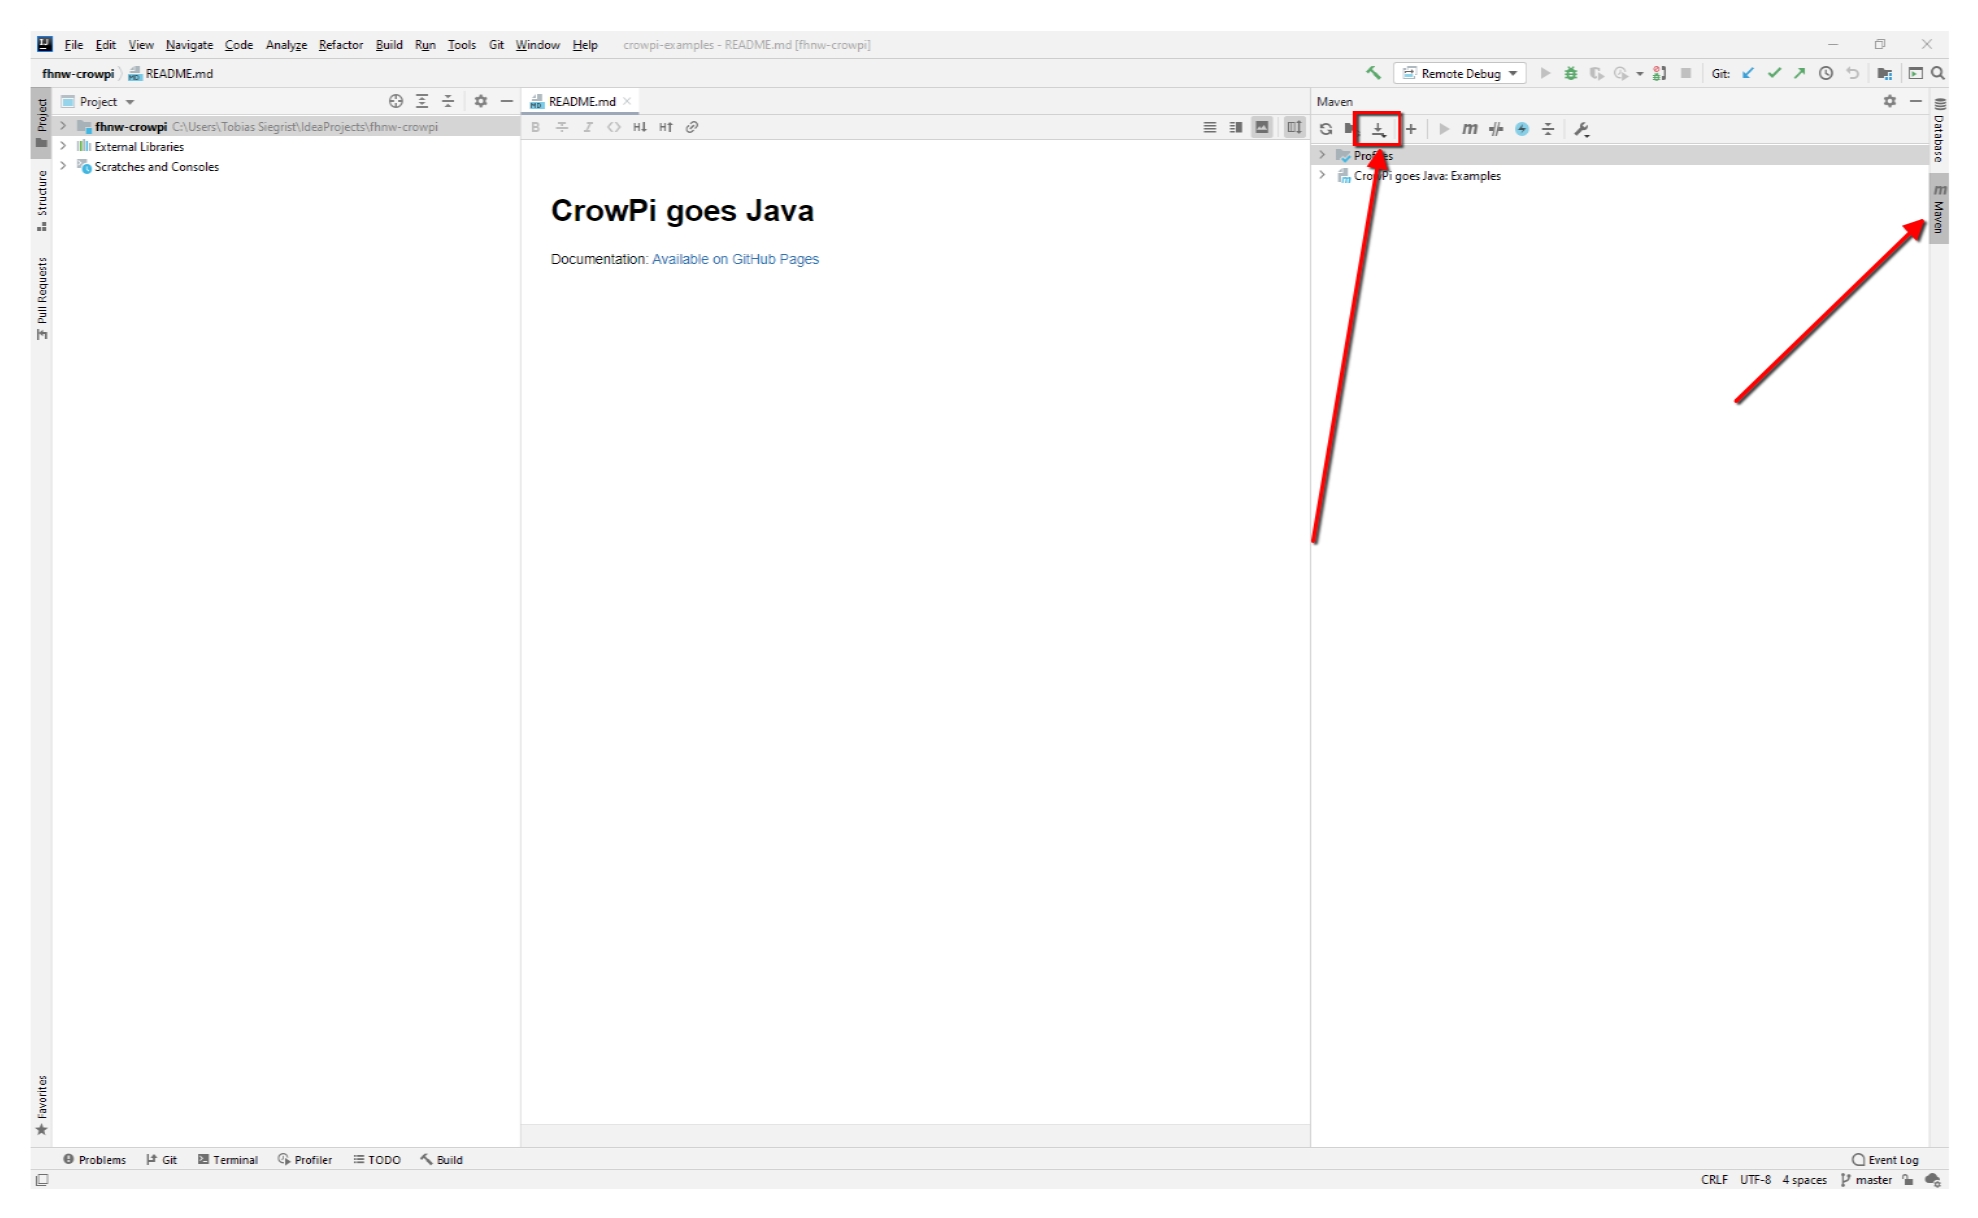
Now a last import step. To be able to better research errors or understand how the code of the dependencies works, the “Maven Sources and Documentation” must be downloaded. This can be done with a few clicks. Open the Maven project menu on the far right. Click on “Download Sources and/or Documentation”. Then in the context menu “Download Sources and Documentation”. Now all used libraries are locally available and visible.
Now only the start configuration of the project is missing, which is described in the next section.
Setting the run configuration
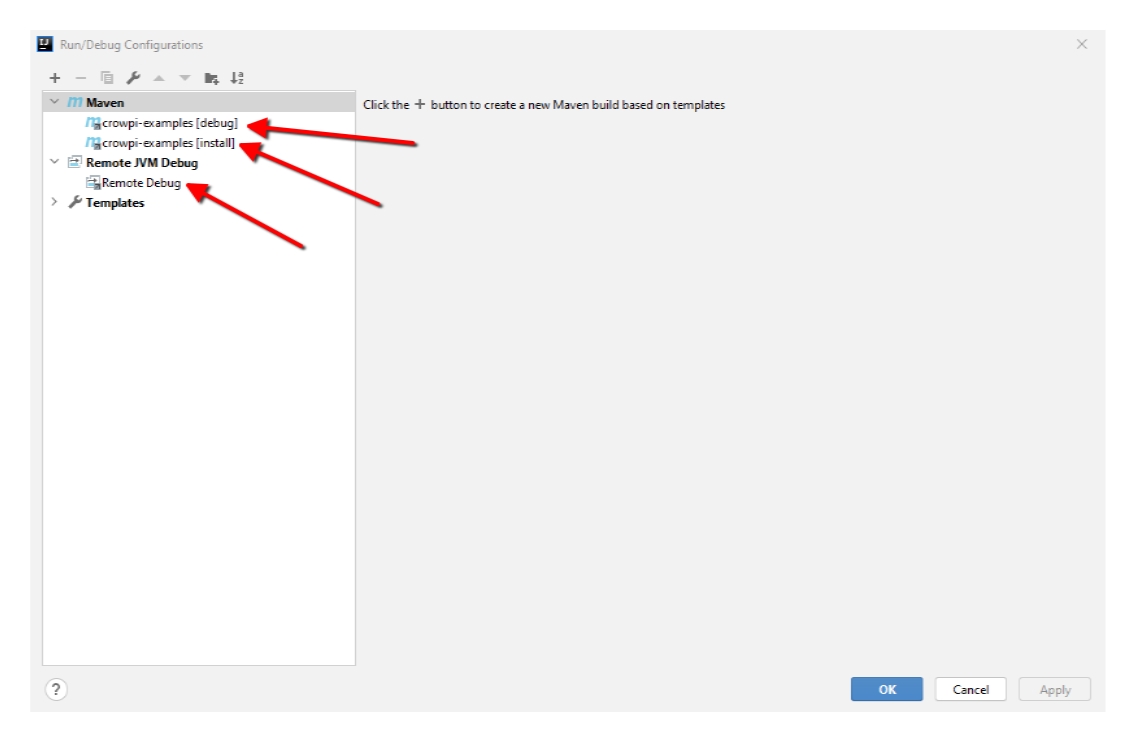
The CrowPi project uses 3 run configurations. These define which parts of the code are executed and how. However, there is no need to worry, because most of it is already predefined and all you have to do is enter the IP address of your Raspberry Pi to push and run the code from your PC to the Pi. The following configurations are used:
- crowpi-examples [install]
- crowpi-examples [debug]
- Remote Debug
With “crowpi-examples [install]” the current code is copied to the Raspberry Pi. This works via a combination of SSH/SCP. The copied code is then started on the Raspberry Pi. “crowpi-examples [debug]” does the same, but other options are selected during the connection, and a debugger is waiting until the application is actually executed. “Remote Debug” provides exactly this debugger. This connects to the Raspberry Pi and troubleshooting can begin.
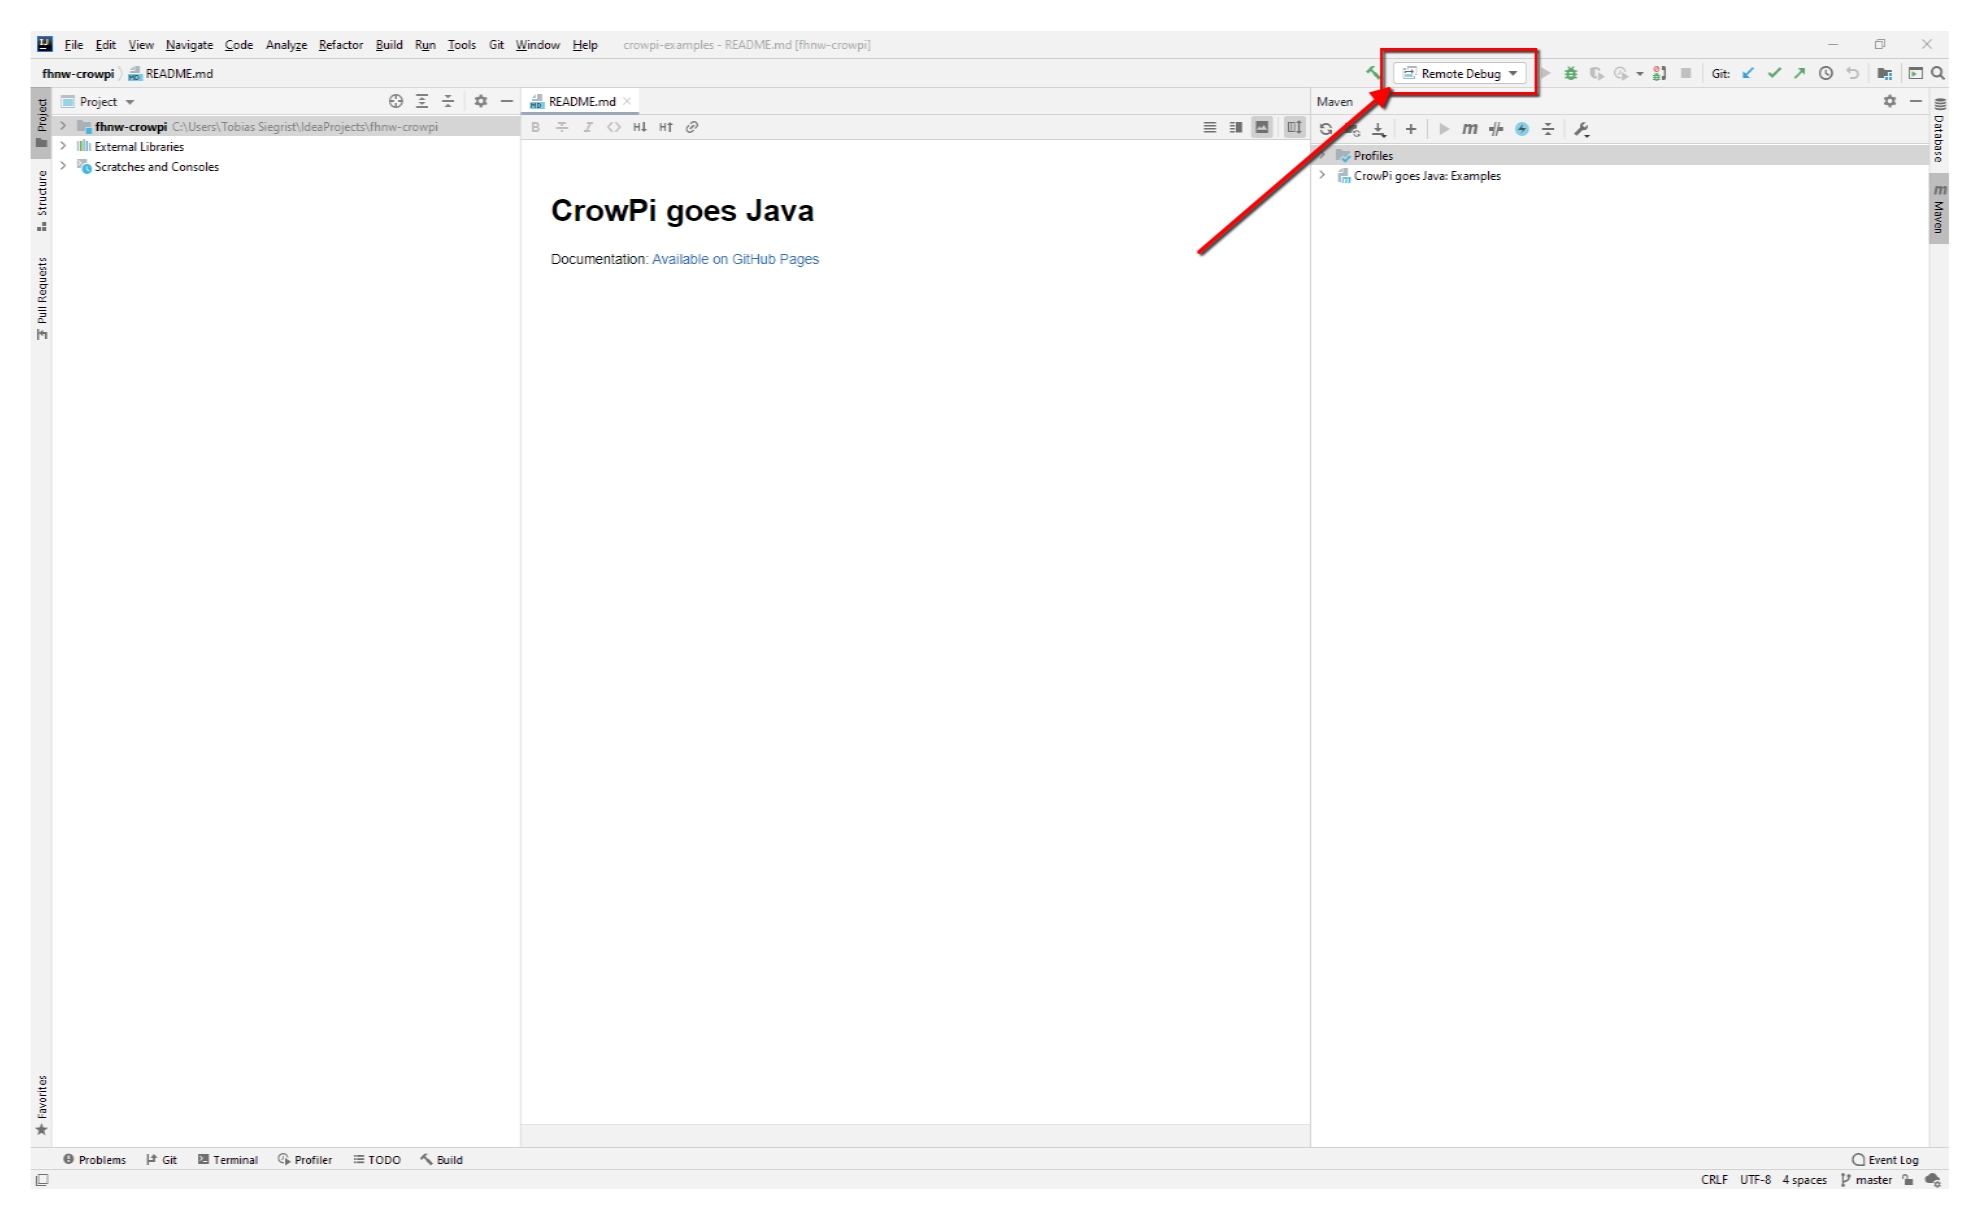
To make everything work smoothly, the IP address of the Raspberry Pi must first be configured. To do this, click here and select “Edit Configurations”. As explained before, the IP address of the Raspberry Pi is displayed on the background image of CrowPi.
The dialog for setting the configurations now opens. A little hint: wherever the IP address of the Raspberry Pi is required, there is already a placeholder “Add CrowPi IP here”.
Depending on the configuration of your Raspberry Pi, you may need to define one of this available properties:
- crowpi.remote.port, default 22
- crowpi.remote.username, default pi
- crowpi.remote.password, default pi
- crowpi.remote.target, default ???
- crowpi.launcher.class, default ???
- crowpi.launcher.args, default ???
crowpi.remote.host specifies the IP/hostname of the CrowPi, defaults to empty crowpi.remote.port defaults to 22 and specifies the SSH server port crowpi.remote.username defaults to pi crowpi.remote.password defaults to crowpi (this deviates from the Raspberry Pi OS default which is raspberry) crowpi.remote.target is the destination folder on the CrowPi where the compiled JAR files are copied to before execution and defaults to /home/pi/deploy (auto-created if missing) crowpi.launcher.class is the class path which should get launched by the JVM, defaults to com.pi4j.crowpi/com.pi4j.crowpi.Launcher and should not be changed (warranty void if you do so :wink:) crowpi.launcher.args are the arguments passed to the application launched by the JVM, specified as a string, passed through as-is without quoting, so e.g. BuzzerApp to launch that directly. Defaults to empty / no args.
The first five are only needed for remote deployments. Leaving crowpi.remote.host empty triggers local deployment.
There is also crowpi.remote.jvmOptions if you want to add any custom JVM options, defaults to empty or options for remote debug if Maven profile debug is used (edited)
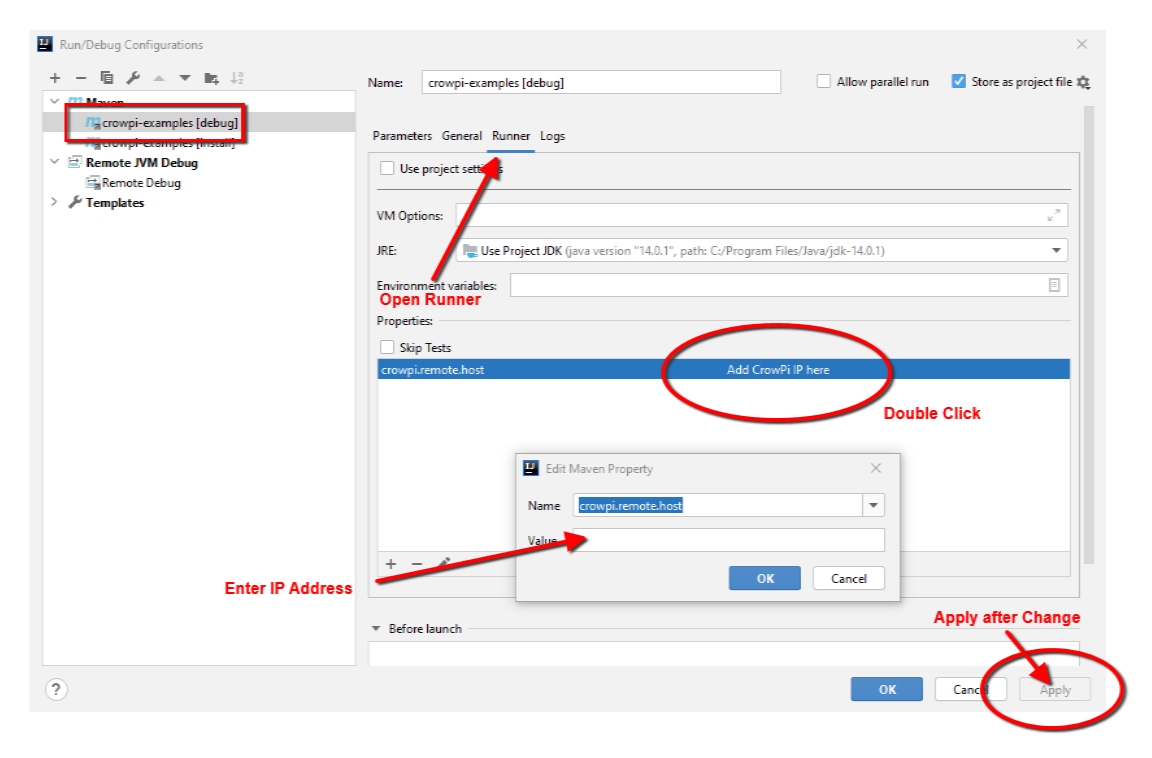
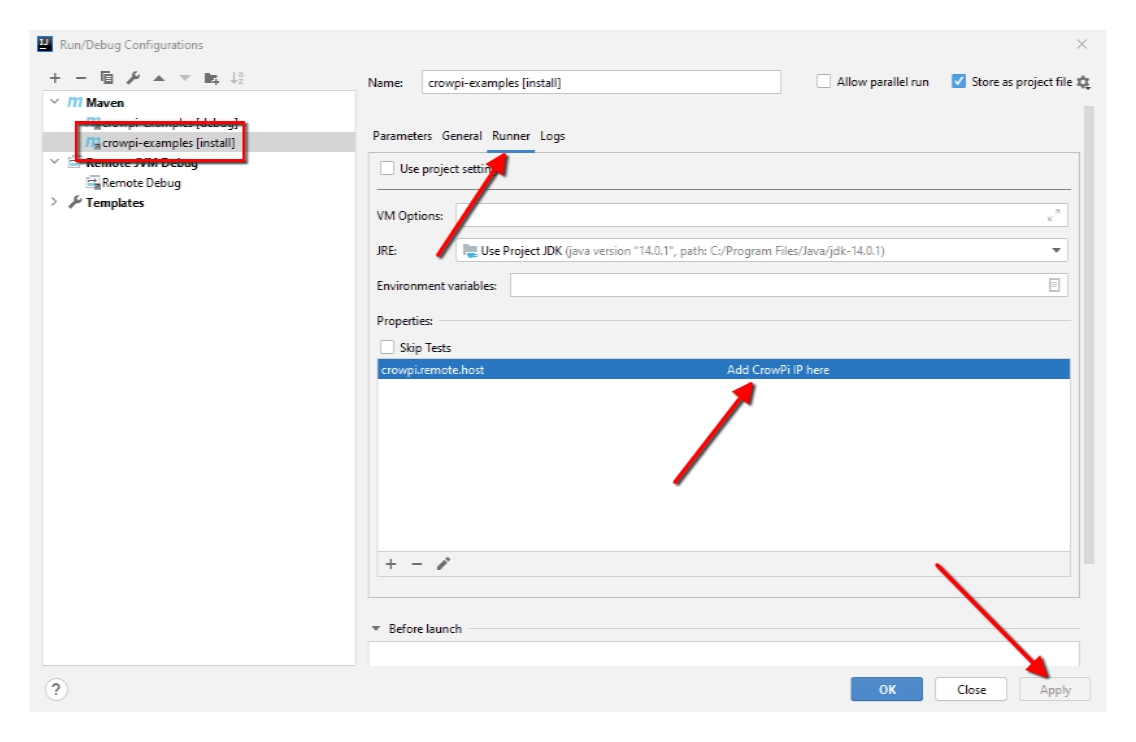
First we configure “crowpi-examples [debug]”. For this, as in the picture, go to the tab “Runner” open and double click on “Add CrowPi IP here”. The dialog window to provide the IP address opens. Confirm with “OK” and press “Apply” to save.
Now we can configure “crowpi-examples [install]”. This works exactly the same as “crowpi-examples [debug]”. The same setting is required. Again use “Apply” to save.
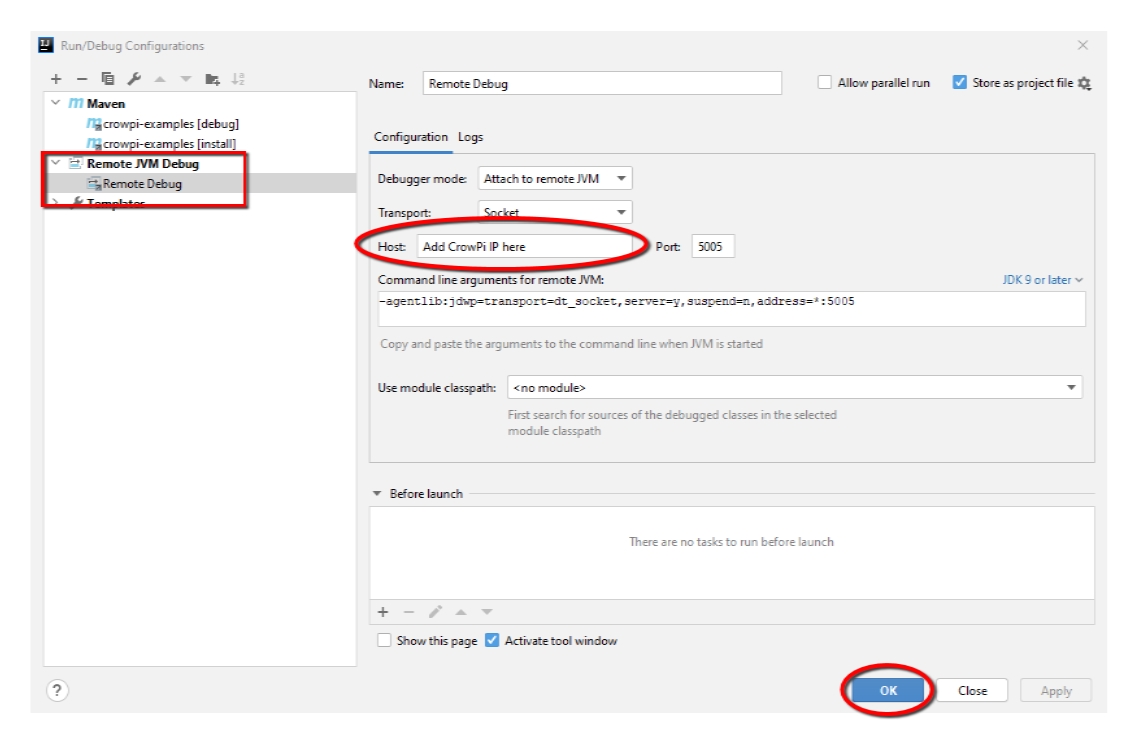
Now the last configuration for “Remote Debug”. The menu is a bit different here. However, it is easier to use than the previous ones. Add the IP Address in the “Host” field. With “OK” the setting is finished.
First test run
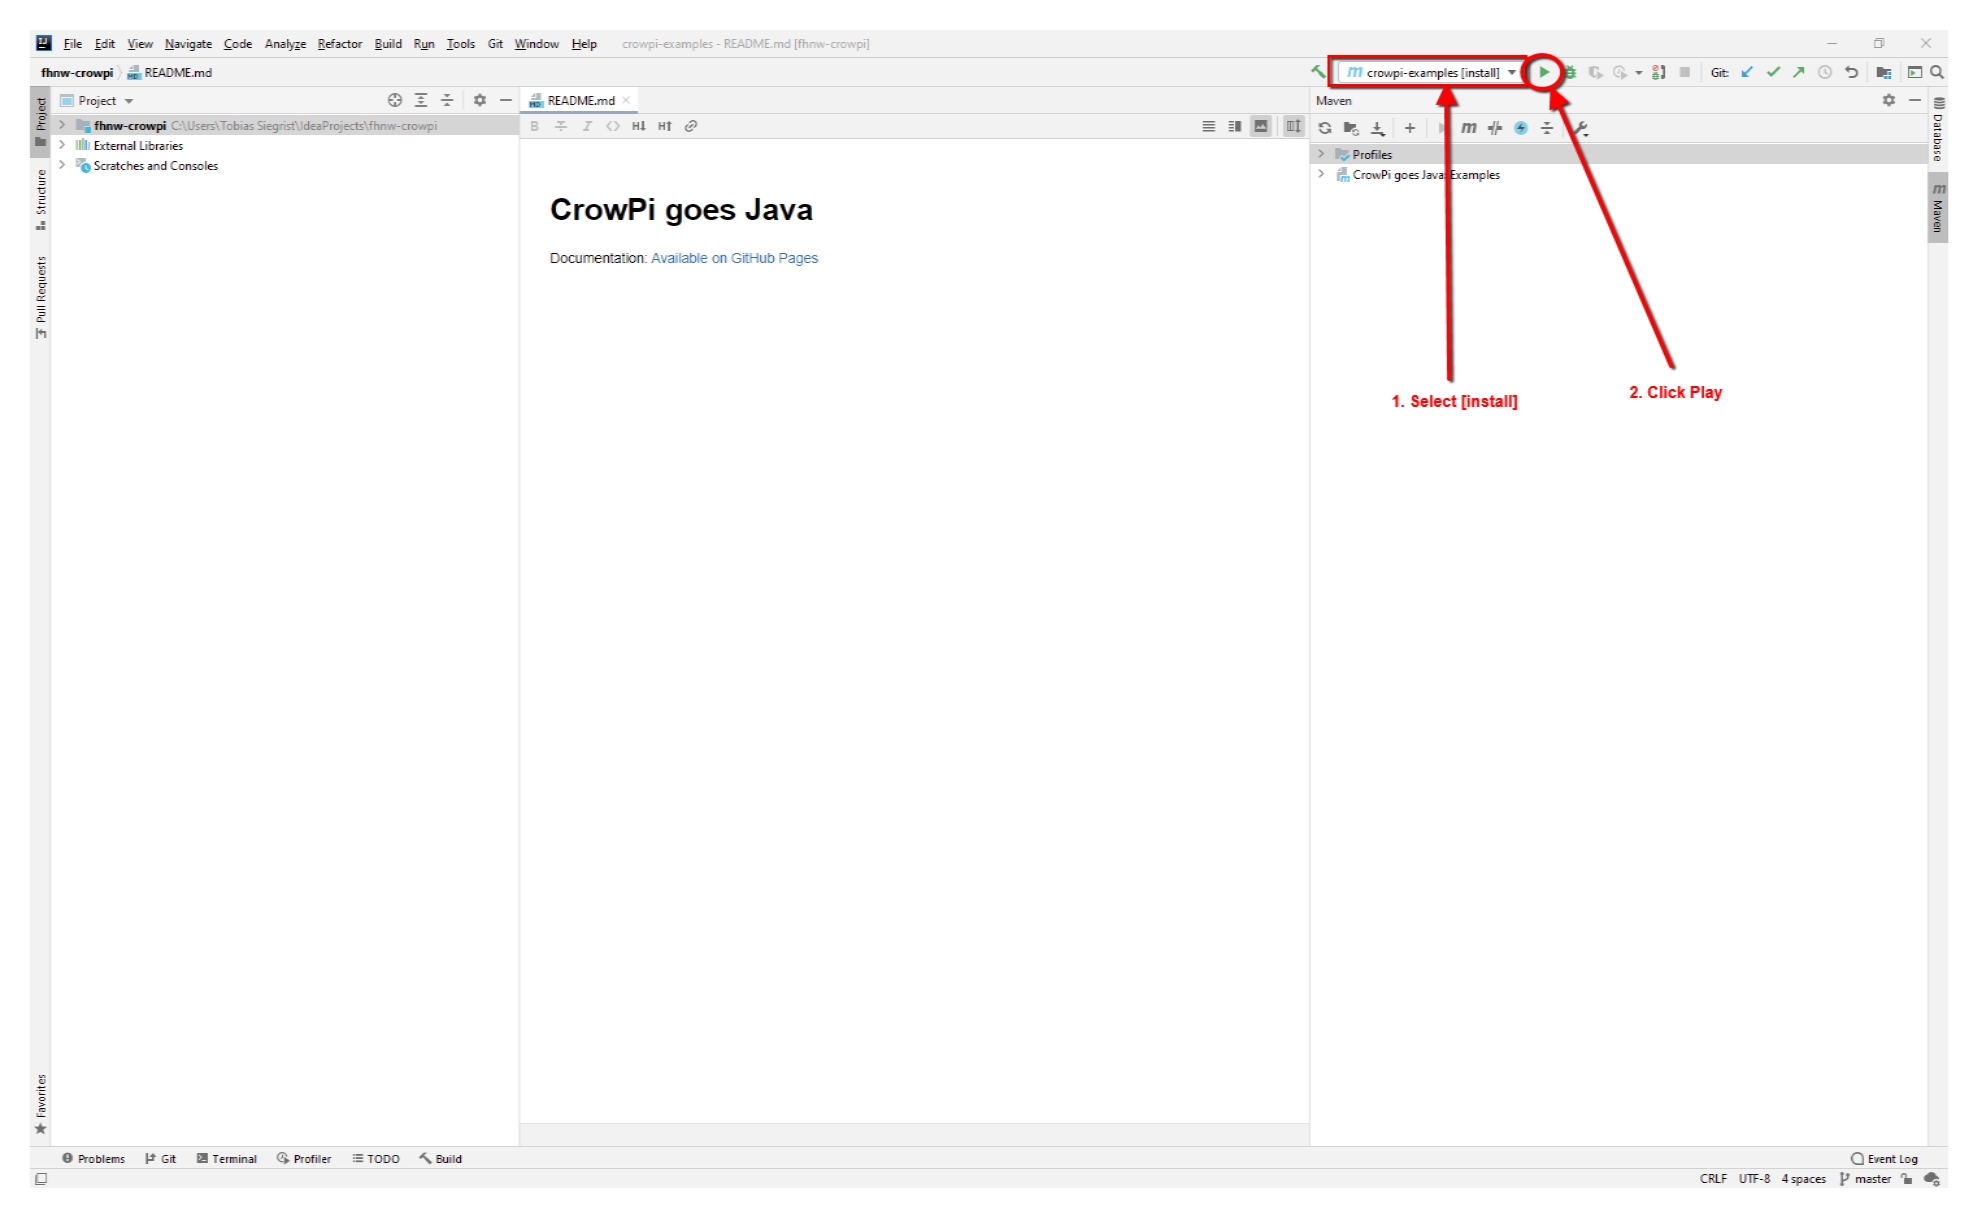
Everything is set up to start the CrowPi project for the first time directly from the development environment. Select the run configuration “crowpi-examples [install]”. Then start the application by pressing the green play button.
It immediately opens the “Run” window in IntelliJ IDEA. It takes a moment, and some text is displayed on the command line. After a few seconds the output stops, and it looks like this:
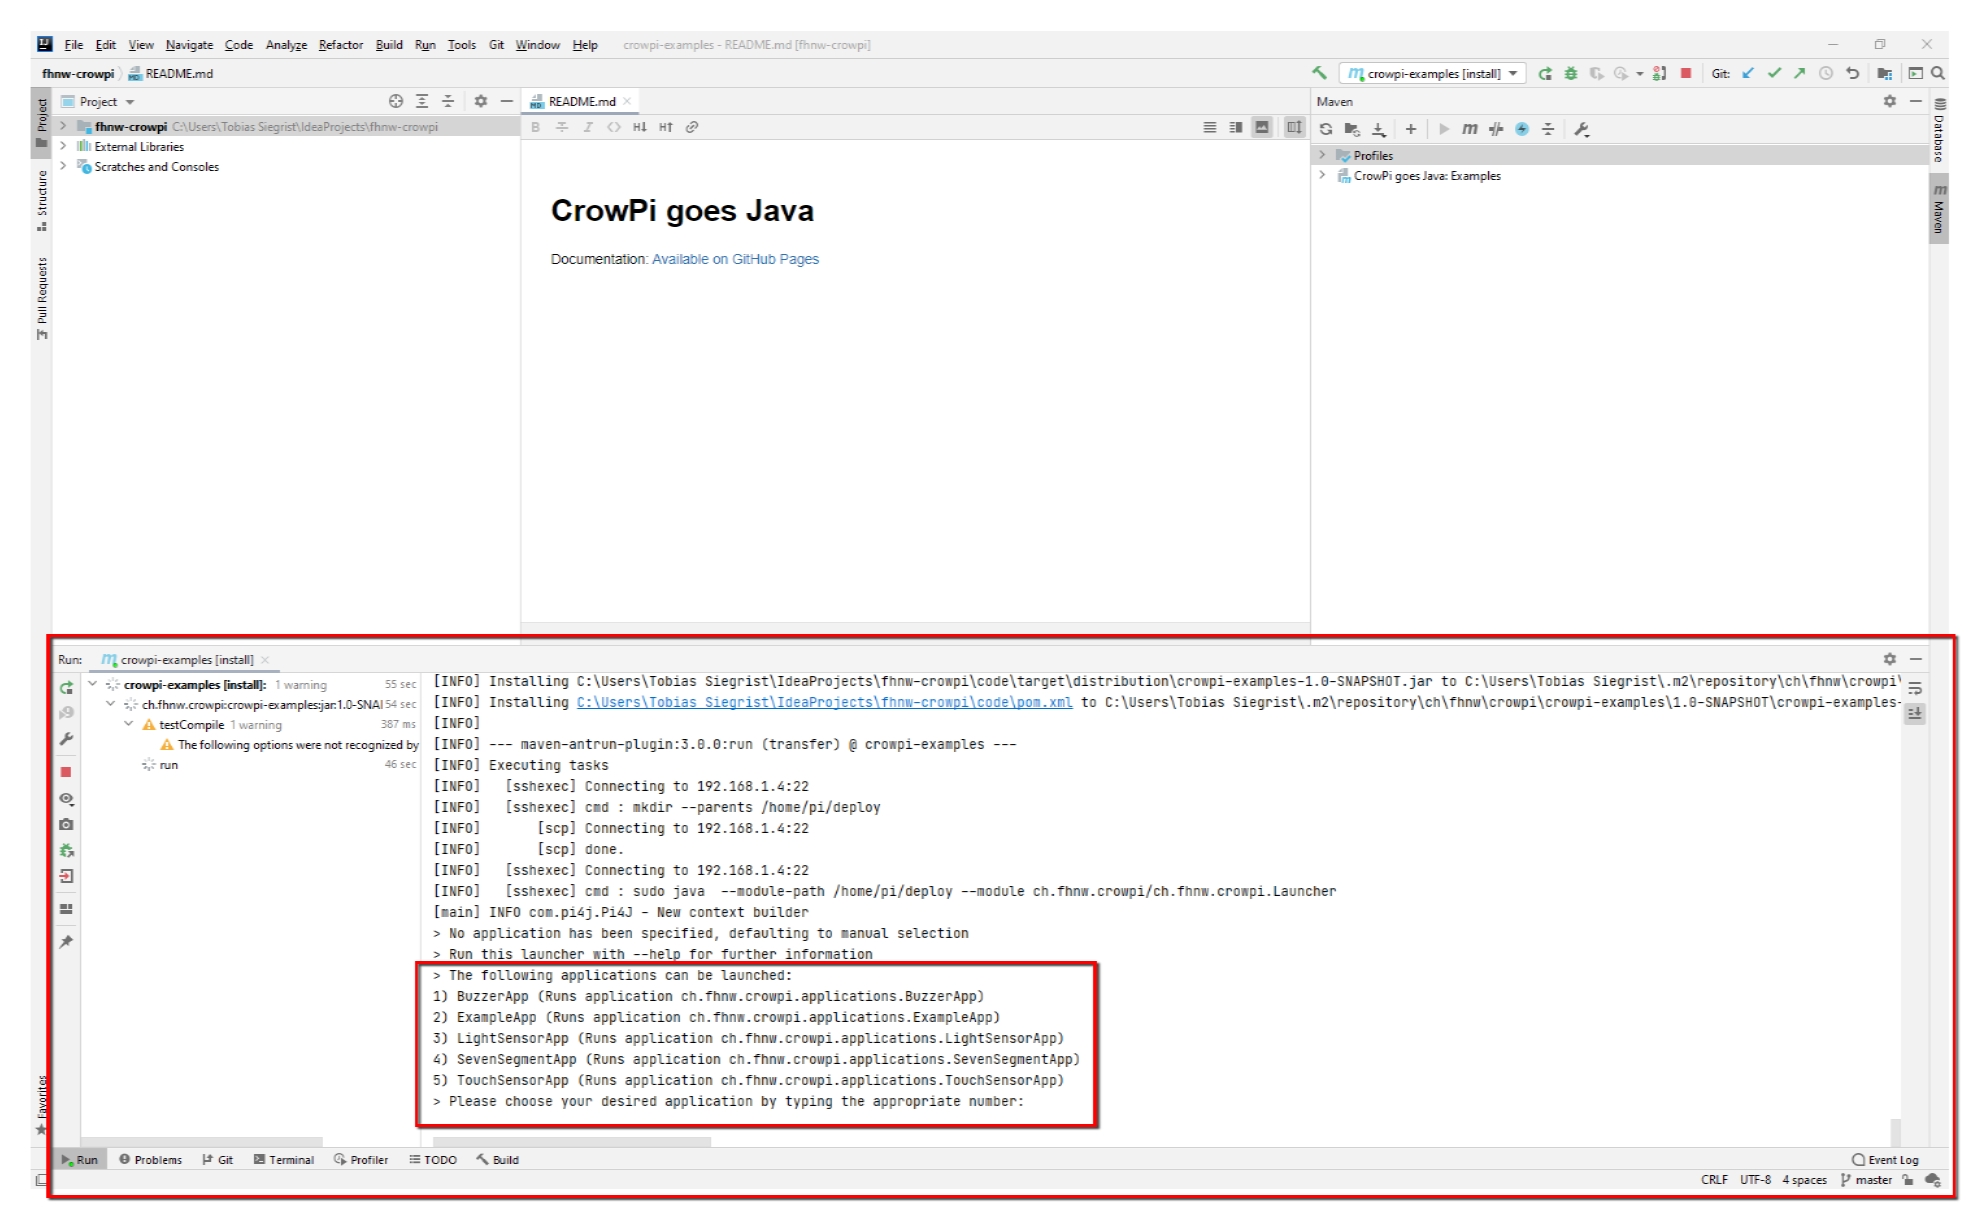
A number can now be typed in here according to the displayed list (+ Enter). The corresponding sample application is then executed. If there are still error messages in the command line, it is worth checking the network connection of the computer and the Raspberry Pi again.