AD Converter ADS1115
Description
The Analog Digital Converter Ads1115 is a template class, that you can use in your own Java-project. The ADS1115 device is a precision, low-power, 16-bit, I2C-compatible, analog-to-digital converter (ADCs). The ADS1115 device incorporates a low-drift voltage reference and an oscillator as well as a programmable gain amplifier (PGA) and a digital comparator. These features, along with a wide operating supply range, makes the ADS1115 well suited for power- and space-constrained, sensor measurement applications.
The ADS1115 performs conversions at data rates up to 860 samples per second (SPS). The PGA offers input ranges from ±256 mV to ±6.144 V, allowing precise large- and small-signal measurements. The ADS1115 features an input multiplexer (MUX) that allows two differential or four single-ended input measurements. Use the digital comparator for under- and overvoltage detection.
The ADS1115 operates in either continuous-conversion mode or single-shot mode. The device is automatically powered down after one conversion in single-shot mode. Therefore, power consumption is significantly reduced during idle periods.
The Template Class gives you the possibility of a single shot recording, or to measure it continuously.
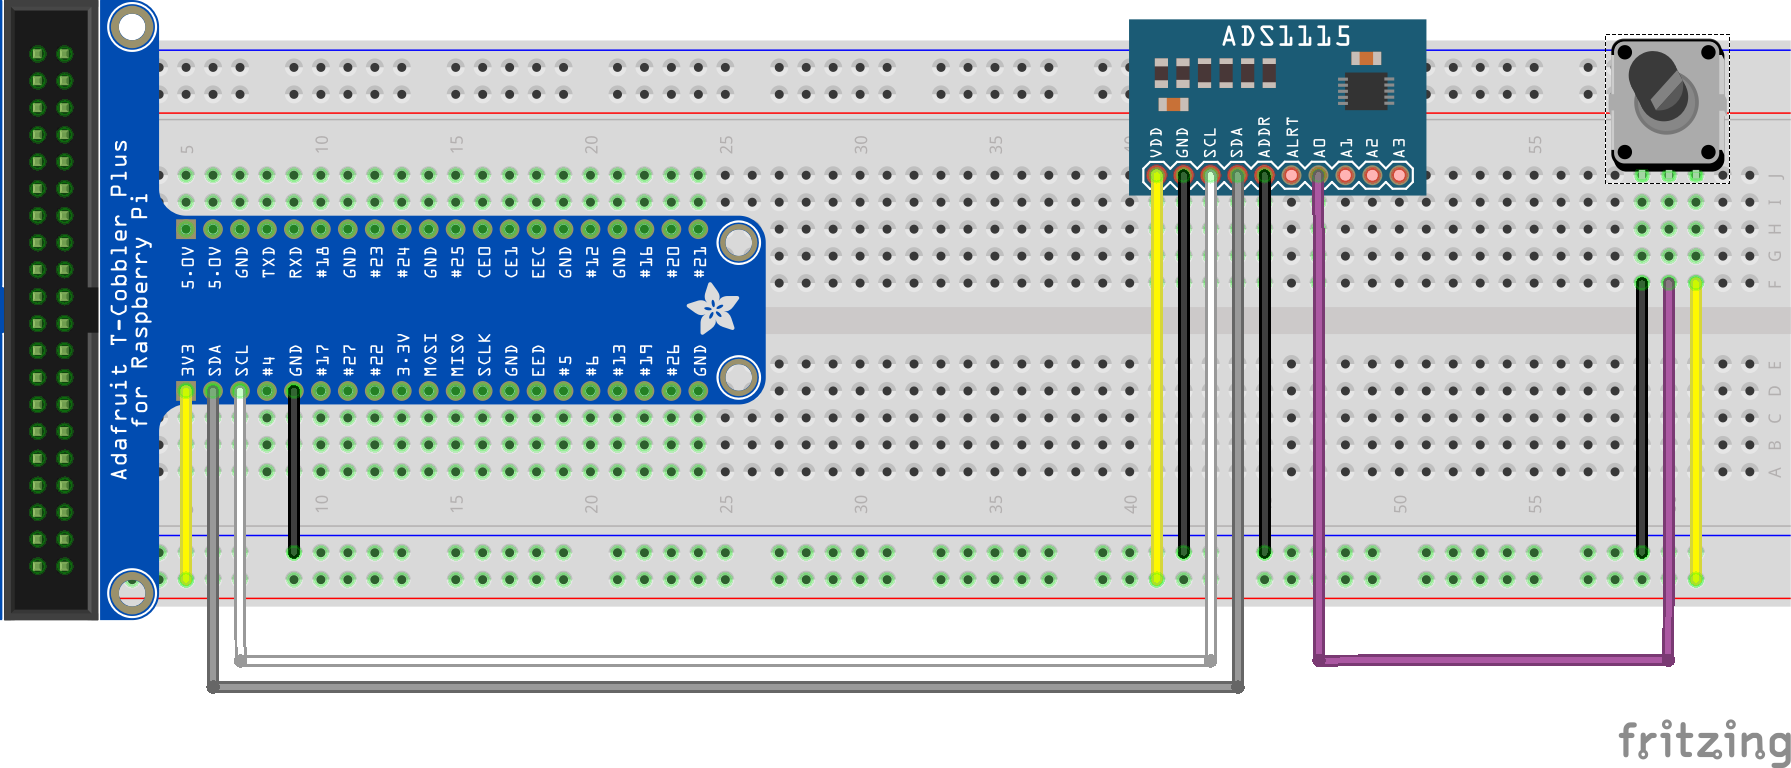
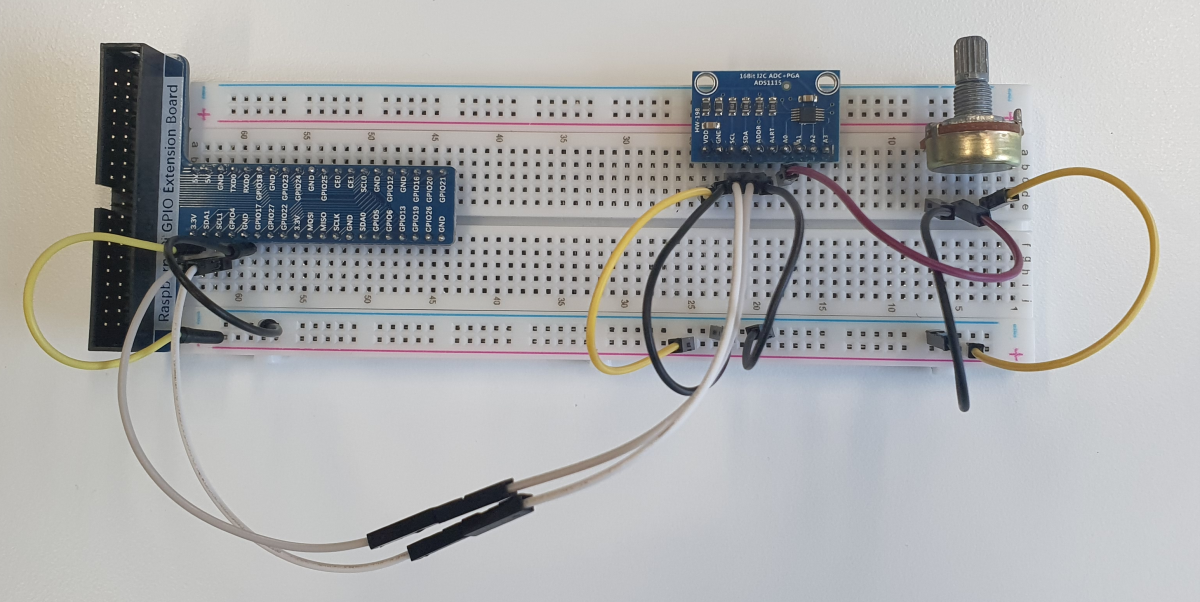
Layout
Code
A simple example on how to use the AD converter from the Hardware-Catalog :
The PI4J-Context must add the LinuxFsI2CProvider.newInstance() Provider, which is explained under LinuxFS
pi4j = Pi4J.newContextBuilder()
	.noAutoDetect()
	.add(new RaspberryPiPlatform() {
		@Override
		protected String[] getProviders() {
			return new String[]{};
		}
	})
	.add(PiGpioDigitalInputProvider.newInstance(piGpio),
			PiGpioDigitalOutputProvider.newInstance(piGpio),
			PiGpioPwmProvider.newInstance(piGpio),
			PiGpioSerialProvider.newInstance(piGpio),
			PiGpioSpiProvider.newInstance(piGpio),
			LinuxFsI2CProvider.newInstance()
	)
	.build();
When the right context is loaded, you can use the ADS1115 like following:
public class Ads1115_App implements Application {
    @Override
    public void execute(Context pi4j) {
        System.out.println("ADS1115 demo started ...");

        Ads1115 adc = new Ads1115(pi4j);

        System.out.println("read all channels in single mode");
        singleRead(adc);

        System.out.println("read all channels in continuous mode");
        continuousRead(adc);

        //cleanup
        adc.reset();

        System.out.println("ADS1115 demo finished");
    }

    private void singleRead(Ads1115 adc) {
        System.out.println("Single read started ...");
        //read analog value from all four channels
        double aIn0 = adc.readValue(Ads1115.Channel.A0);
        double aIn1 = adc.readValue(Ads1115.Channel.A1);
        double aIn2 = adc.readValue(Ads1115.Channel.A2);
        double aIn3 = adc.readValue(Ads1115.Channel.A3);
        System.out.printf("Voltages: a0=%.3f V, a1=%.3f V, a2=%.3f V, a3=%.3f V%n", aIn0, aIn1, aIn2, aIn3);

        System.out.println("Single read done.");
    }

    private void continuousRead(Ads1115 adc) {
        System.out.println("Continuous read started ...");

        // Register event handlers to print a message on value change
        adc.onValueChange(Ads1115.Channel.A0, (value) -> System.out.printf("Value channel 0 : %.2f V%n", value));
        adc.onValueChange(Ads1115.Channel.A1, (value) -> System.out.printf("Value channel 1 : %.2f V%n", value));
        adc.onValueChange(Ads1115.Channel.A2, (value) -> System.out.printf("Value channel 2 : %.2f V%n", value));
        adc.onValueChange(Ads1115.Channel.A3, (value) -> System.out.printf("Value channel 3 : %.2f V%n", value));

        adc.startContinuousReading(0.1);

        // continue reading for 30 seconds
        delay(Duration.ofSeconds(30));

        adc.stopContinuousReading();

        System.out.println("Continuous read done.");
    }

}
Further project ideas
- An application, which detects the deflection of an analog joystick.
- An application, that determines the current position of a potentiometer.