BMP280 Sensor
Description
The BMP280 is a Pressure and temperature sensor accessed via I2C or SPI. The BMP280 is a simple device that requires the connection of few wires to operate. Because of this simplicity the device can serve as a very easy project for initial Pi and Pi4j usage. This document will explain the more simple means to connect the sensor and access the device with existing software requiring no coding. The document will also explain minimal coding required to allow greater flexibility.
A later section explains creating a more robust proto-type environment to better support using various integrated circuits, see Prototype board.
Connecting Adafruit BMP280
After soldering the pins to the PCB you can use female-female jumpers to connect directly to the Pi GPIO pins.
Power off the Pi with sudo shutdown prior to making connections.
Or if you complete these connections with power applied, connect CS to
3.3v before connecting Vin. This is required to ensure the I2C interface is
enabled, else the chip enables SPI communication protocol.
Component and wiring
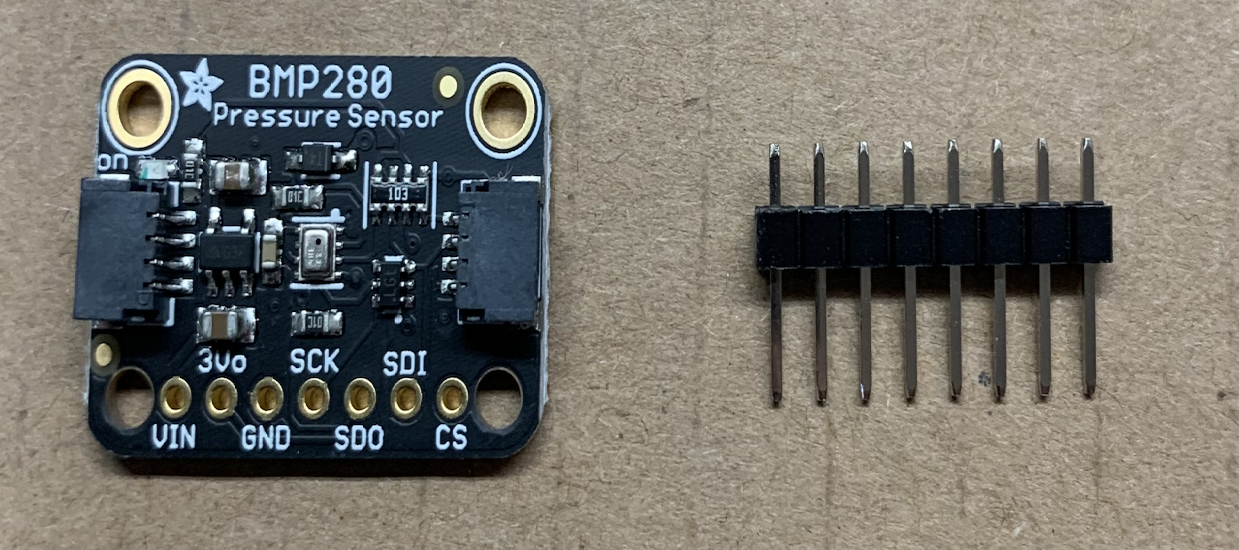
BMP280 module
The following shot is the Adafruit BMP280 module. The BMP280 chip is mounted on a small circuit board with pins to solder in for connections.
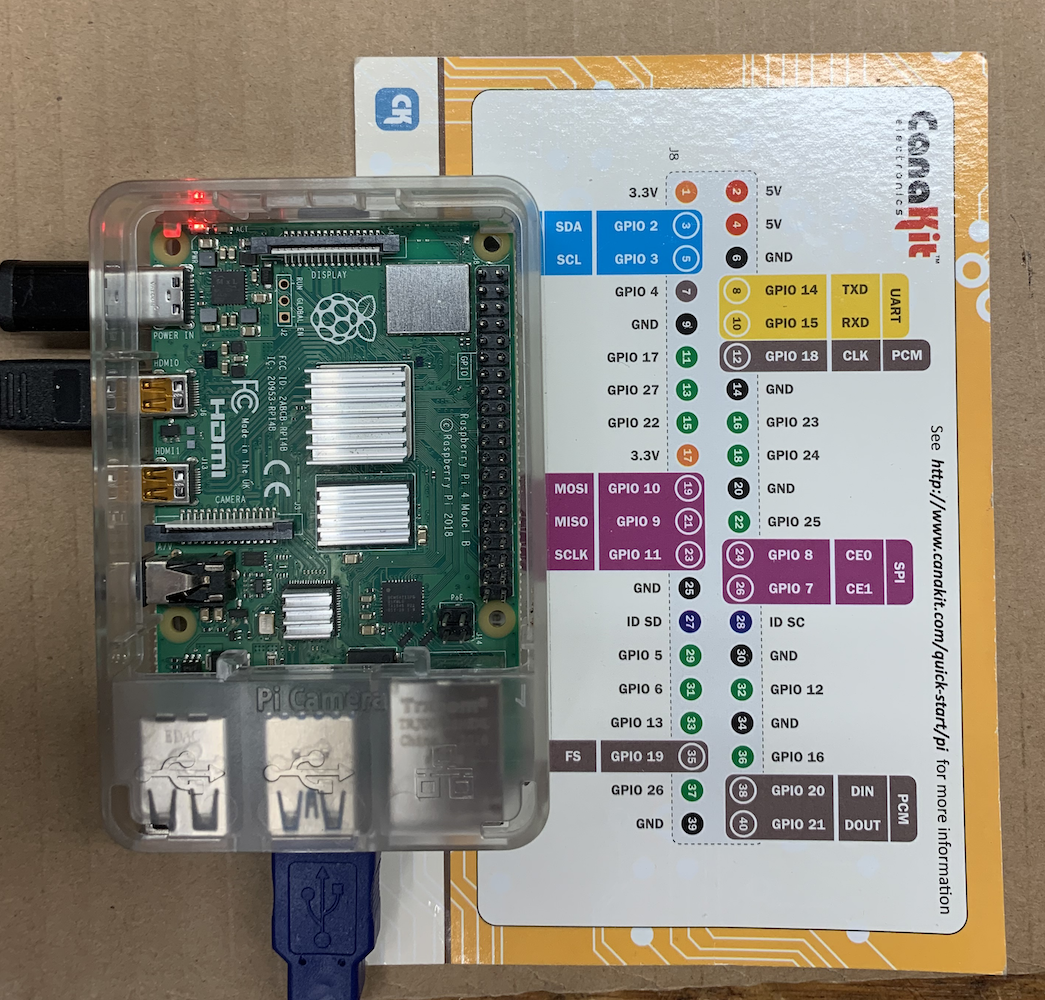
40 pin identification
This shot is the Pi with an easy to read card that identifies the 40 pin connector.
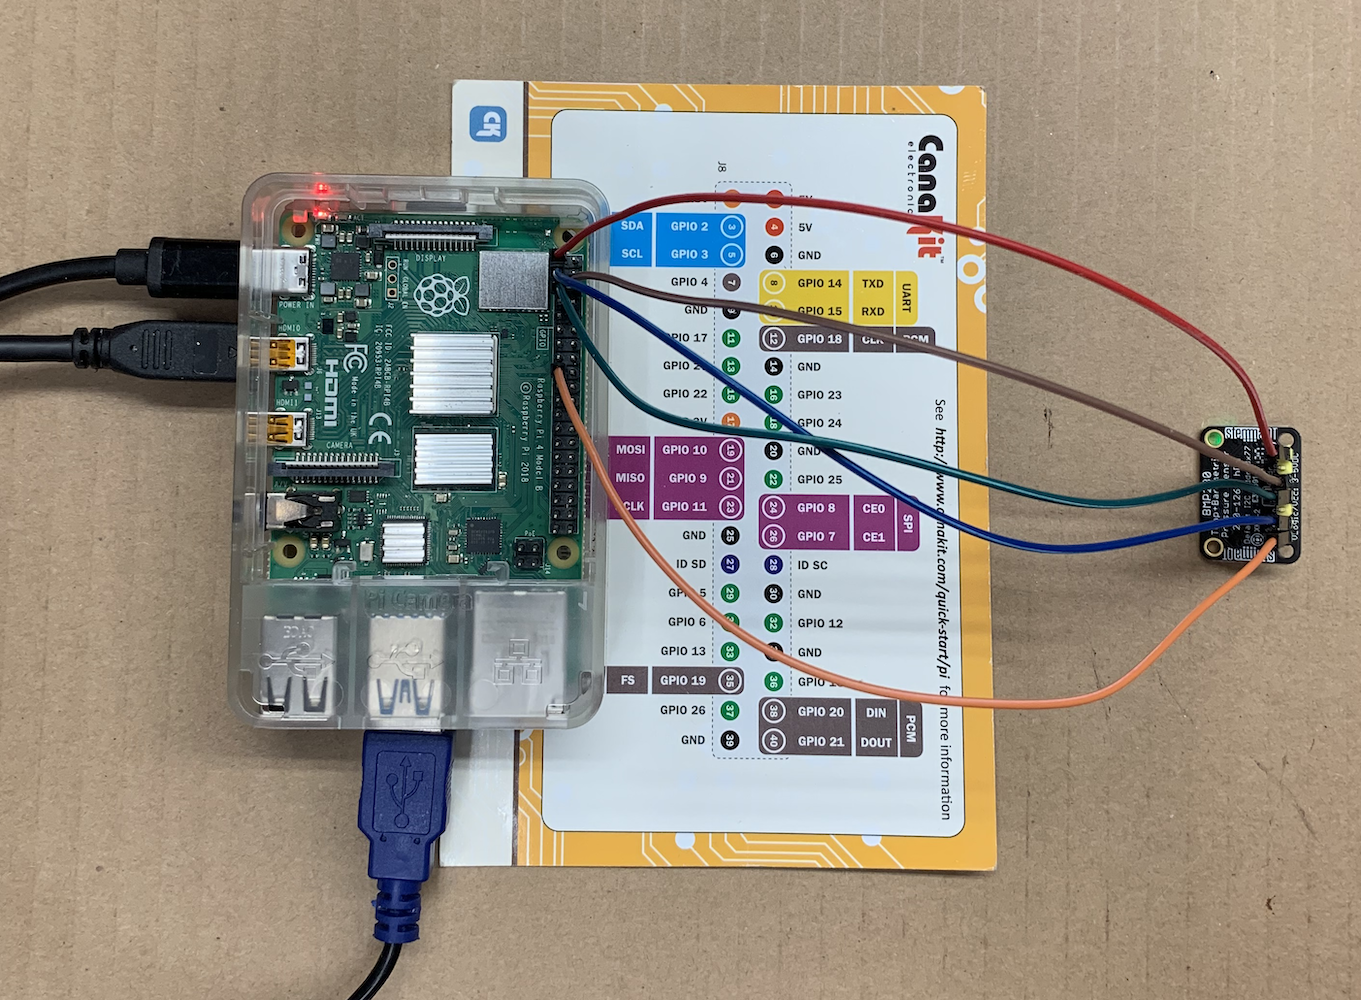
40 pin connection
This is the BMP280 module connected to the Pi 40 pin connector.
Header Pin/Colors – Pi 40 pin connector
| Pin | Color | Description |
|---|---|---|
| Vin | Red | to Pi 3.3 pin 1 |
| 3v | N/C | |
| Gnd | Brown | to Pi pin 6 |
| SCK | Green | to Pi pin 5 |
| SDO | N/C | |
| SDI | Blue | to Pi pin 3 |
| CS | Orange | to Pi pin 17 |
Validate Connections
Power on the Pi. Log in as usual.
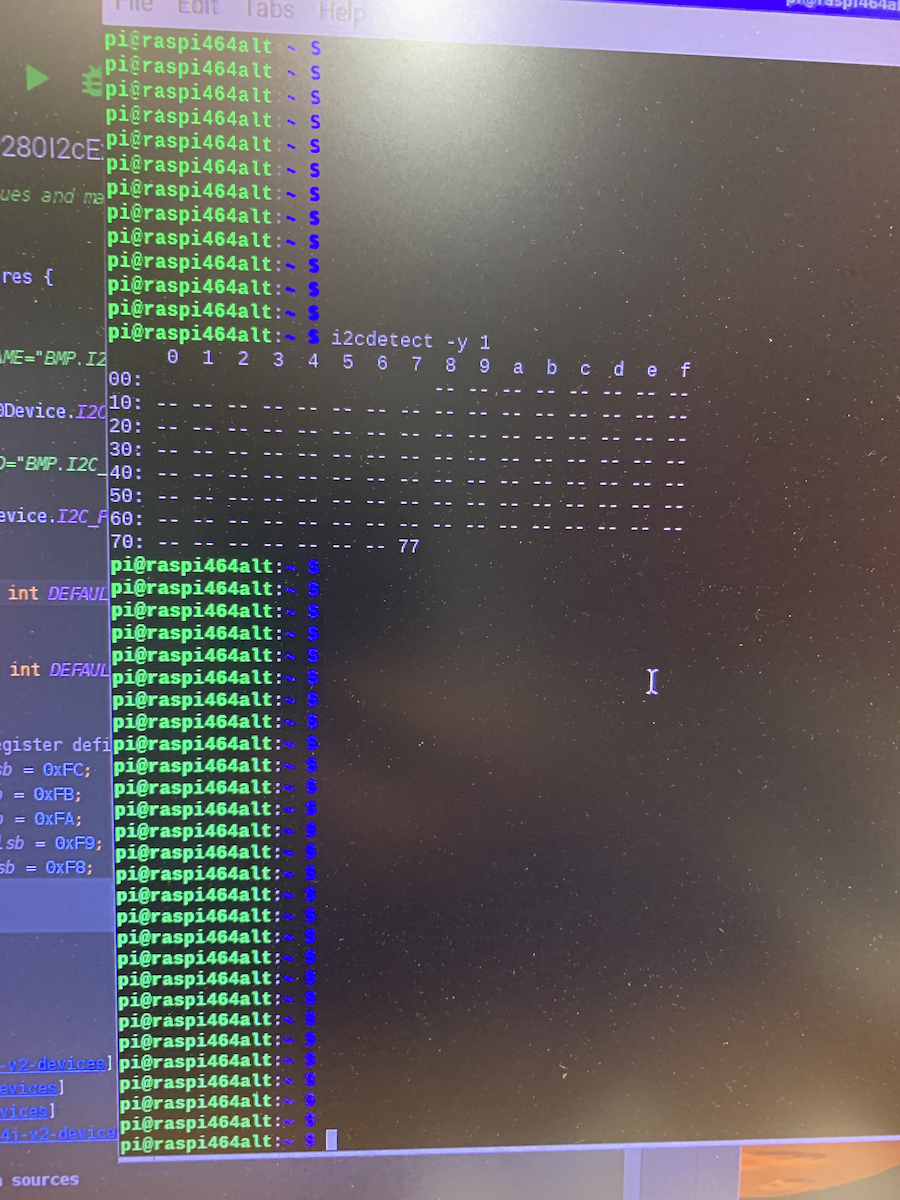
Run the command i2cdetect -y 1. This command will display all I2C devices
connected to I2C bus 1. In this case only the BMP280 is connected so the table
should include a device 77, 0x77 being the device address of the BMP280.
Build via Maven
The Pi4j project uses git via github for the source code repository. The main Pi4J documentation provides details of the repository and maven build process.
The project Example Devices uses the prescribed Maven build process. It is easiest to git clone the Example Devices directory and use these steps to build. Note: each device within this directory contains a README.md that explains the expected Hardware connections, build process, and how to use the device via these modules.
$ mvn clean package
$ cd target/distribution
$ sudo ./runBMP280.sh
Program output
[main] INFO com.pi4j.util.Console -   I2C detail : com.pi4j.plugin.linuxfs.provider.i2c.LinuxFsI2C@45018215 bus : 1  address : 119
[main] INFO com.pi4j.util.Console -  Temperatue C = 32.37366343149915
[main] INFO com.pi4j.util.Console -  Temperatue F = 90.27259417669848
[main] INFO com.pi4j.util.Console -  Pressure Pa = 97930.29684231618
[main] INFO com.pi4j.util.Console -  Pressure InHg = 28.91894505802476
[main] INFO com.pi4j.util.Console -  Pressure mb = 979.2223518169782
Supporting BMP280 Source Code
This is part of a larger project Example Devices
Code
A simple example on how to use the BMP280 sensor. This requires Example Devices was built.
package com.pi4j.test.devices.bmp280;

import com.pi4j.Pi4J;
import com.pi4j.devices.bmp280.BMP280Device;
import com.pi4j.plugin.linuxfs.provider.i2c.LinuxFsI2CProvider;
import com.pi4j.util.Console;

public class BMP280 {

    public static void main(String[] args) throws Exception {
        // ------------------------------------------------------------
        // Initialize the Pi4J Runtime Context
        // ------------------------------------------------------------
        // Before you can use Pi4J you must initialize a new runtime
        // context.
        //
        // The 'Pi4J' static class includes a few helper context
        // creators for the most common use cases.  The 'newAutoContext()'
        // method will automatically load all available Pi4J
        // extensions found in the application's classpath which
        // may include 'Platforms' and 'I/O Providers'

        var pi4j = Pi4J.newContextBuilder().add(
                LinuxFsI2CProvider.newInstance()).build();

        // print installed providers
        System.out.println("----------------------------------------------------------");
        System.out.println("PI4J PROVIDERS");
        System.out.println("----------------------------------------------------------");
        pi4j.providers().describe().print(System.out);
        System.out.println("----------------------------------------------------------");

        final Console console = new Console();
        console.print("==============================================================");
        console.print("startup  BMP280   ");
        console.print("==============================================================");

        var bmpDev = new BMP280Device(pi4j, console, 1, 0x77, "info");
        bmpDev.initSensor();
        console.println("  Dev I2C detail    " + bmpDev.i2cDetail());
        console.println("  Setup ----------------------------------------------------------");

        console.println("  I2C detail : " + bmpDev.i2cDetail());

        double reading1 = bmpDev.temperatureC();
        console.println(" Temperatue C = " + reading1);

        double reading2 = bmpDev.temperatureF();
        console.println(" Temperatue F = " + reading2);

        double press1 = bmpDev.pressurePa();
        console.println(" Pressure Pa = " + press1);

        double press2 = bmpDev.pressureIn();
        console.println(" Pressure InHg = " + press2);

        double press3 = bmpDev.pressureMb();
        console.println(" Pressure mb = " + press3);

        // Shutdown Pi4J
        pi4j.shutdown();
    }
}


